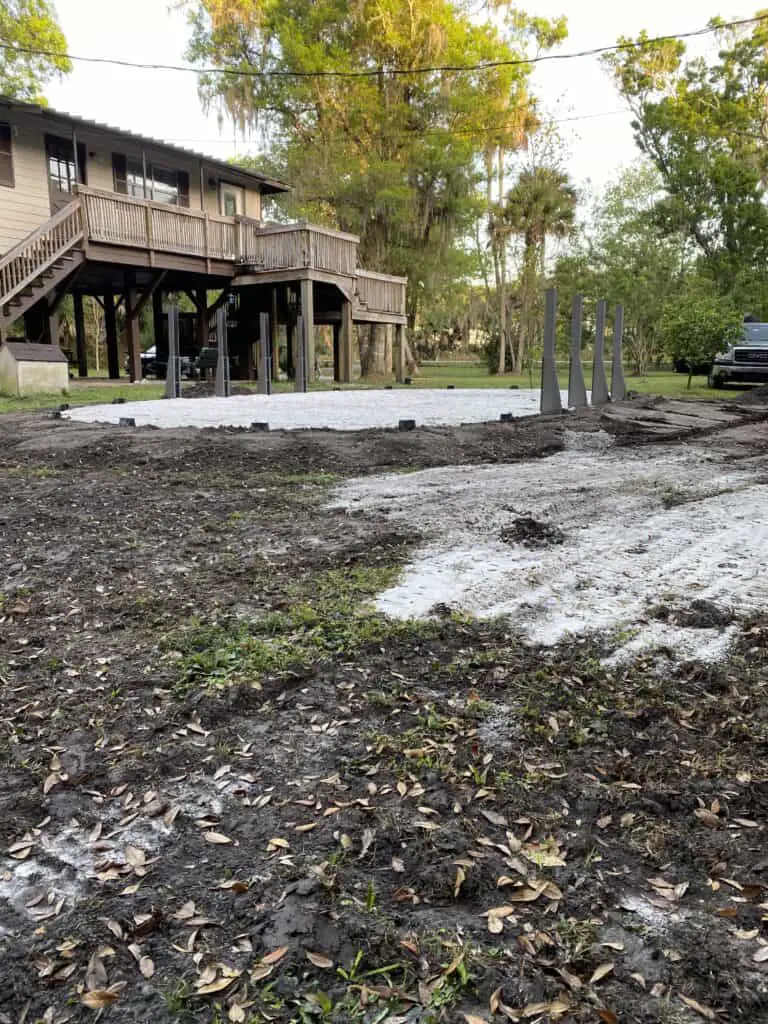
The biggest issue do-it-yourselfers have with installing an above-ground swimming pool is getting it level. The success of this starts with leveling the ground.
To level the ground for installing an above ground pool, mark out the area where the pool is going plus one foot, remove the grass/sod, determine the grade of the site, then level the site by transferring the earth from the high side to the low side until level.
FIRST REALITY CHECK – REMOVE THE GRASS!
Here’s a common scenario. You’ve bought a pool for less from Walmart made by Intex or Coleman and it came in one big box.
You don’t have a lot of money to have it installed OR you can’t find anyone to install it, so you’re gonna put it up yourself.
Since you didn’t pay much for the pool and aren’t expecting much from an above-ground pool, your mentality is to put it up quickly and with minimal effort. You go out to the backyard and find a good somewhat level spot to put it up.
Now here’s your first and biggest mistake – In looking at the spot, you determine that the pool can go right on top of the grass. Yeah, no.
It doesn’t matter if your yard looks perfectly level, you bought a walmart boxed pool or got a custom resin above ground pool, if you want the pool to stay up, you’ll want to remove the grass before leveling and assembling the pool. Period.
Many soft-sided pools have to be re-leveled and re-installed because they didn’t remove the grass
REMOVING THE GRASS IS A TOUGH JOB!
As an above-ground pool installer for 35 years and counting, it’s very common for me to come to an install site where the homeowner had first attempted to self-install.
What I see is a small area of the pool site with grass removed. Usually, less than two square feet has been removed. The homeowner laughs when they tell me that’s as far as they got to taking up the grass.
Removing the sod from a yard is not easy, even for a guy like me who has manually removed thousands of square feet of it when I was younger. And this is with using a quality square-headed shovel having a very sharp edge on it.
People usually try to tackle this sod removal job with the shovel they have. Most people only have a cheap spade-shaped shovel with no edge on it. To remove a twenty-foot circle of sod with something like that is crazy. I wouldn’t do it for any amount of money (well that’s not true, but it would be a high number).
The grass must go, so here’s what you do – Rent a sod cutter.
Renting a sod cutter should cost you less than $100 (by 2021 prices) and will be maybe the best money you’ll spend in a decade. Seriously, a “cutter” makes the job soooo much easier.
Ok, now that I’ve got you in the right mentality for self-installing your pool, here’s how to level your ground so the pool stays up for more than a month.
TOOLS NEEDED TO LEVEL THE GROUND FOR A SWIMMING POOL (THE KEY TO YOUR SUCCESS)
You don’t need much in the way of tools to level earth, but having the correct tools will help. A lot!
1. Shovel (Don’t just skip over this)
The difference between a good, correct shovel and the wrong one can make all the difference in the world. I’d say having the right shovel alone may make the difference in whether you complete self-install or not.
First off, you want a square-headed shovel for this job. The Reason – Because you are using it the make the earth level and smooth. A spade head shovel is curved, so you can’t use it to make the ground level.
Second (if you can), take a file or grinder and file a sharp edge on the shovel. Shovels don’t come with sharp edges so construction guys like me have to put edges on them.
And a shovel with a sharp edge on it is a “game-changer”, especially when removing grass.
2. A Level
Even a guy like me who has been leveling earth for three and a half decades cannot just level by eye. So, you will be needing a level of some kind for this job. Period.
There are three types of levels that you can use.
A) Four-foot Level (not great) – Most only use a four-foot level because that’s all they have or know about. A four-foot level is a leveling device that is only four feet long.
Most will use a long piece of 2×4 wood along with a four-foot level for this job. While this will work, it’s not ideal as it’s not as accurate as users think it is.
B) Line Level (Better) – The drawback to a line level is that most people aren’t familiar with using it. It’s really pretty easy to use, but you won’t think so when I tell you how.
A line level is just what it says. It’s a small level (about 2-3 inches long) that attaches to a string. When attached to a tightly pulled string, the line level will tell you how to level the entire string line is.
To use one, you’ll need a couple of stakes and a piece of nylon string or twine. The two stakes are pounded into the earth on opposite sides of the area that you want to level, and then a string is tied from one to the other and made tight.
This will give you a tight string running across where the pool is going. Now you can attach the line level to the string and use it to make the string level all the way across. You make the line level by pounding one of the stakes down (which moves the string down on that side) until the string is level.
A line level works very well once you understand it.
C) Builders level / Laser Level (Best) – This is what I use. Most don’t have a builder’s level hanging out in their garage, so most will have to rent one.
What is a builder’s level you ask? It’s the thing that you see when driving by a construction site where one guy is looking through a thing on a tripod while another guy is holding a stick upright somewhere else.
The guy looking through the thing (builder’s level) is reading the numbers on the stick that the other guy is holding. The numbers that line up with what he sees through the level are telling him what the level (or depth) is where the other guy is holding the stick.
Confused? Sorry. If you have one already, then you know how to use it (hopefully). If you rent one, then (hopefully) the rental place will tell you how to use it. It’s not hard at all once you understand what it does.
3. Rake
A rake of some kind is needed to help level the earth and gather unwanted things (small rocks, sticks, glass) for removal.
4. Landscaper’s Rake (Optional)
The difference here is that a landscaper’s rake is very wide. And a wide rake is good for leveling as it is more of a straight surface that you can use to level a bigger area.
A landscaper’s rake is not necessary, but it’s really nice to have one for this job.
5. Come-Along or Concrete Placer (Optional)
This is a toothless rake used in concrete pouring. It’s used to grab and pull wet concrete in place. I have been using come-alongs to grab and pull earth/sand for decades. And it works very well.
Most won’t have access to a come-along (concrete placer) tool, but if you know someone who has one, borrow it for this job. Or you can buy one for around $30, but you won’t use it much for anything else.
6. Rent a Sod Cutter (Optional, I guess)
Some yards don’t have much grass. I have installed pools where it’s just dirt and weeds. For that, you won’t need a sod cutter.
If you have some nice, thick grass though, then renting a sod cutter is almost a “must-do” for this job.
A sod cutter is a fairly small machine that takes up about as much room as a push lawn mover. It can be intimidating to use though as it’s super heavy and has a lot of moving parts.
Sod cutters are not difficult to use, but they are a machine that requires moving some handles, adjusting the cut depth, and engaging the gears.
Don’t worry about it much. There may be a bit of a learning curve with using a sod cutter. But it will be so incredibly worth it. The place you rent one from will give you some instruction. I’m hoping it’s not some 18YO kid.
7. Rent a Skid/Steer Machine (Very optional)
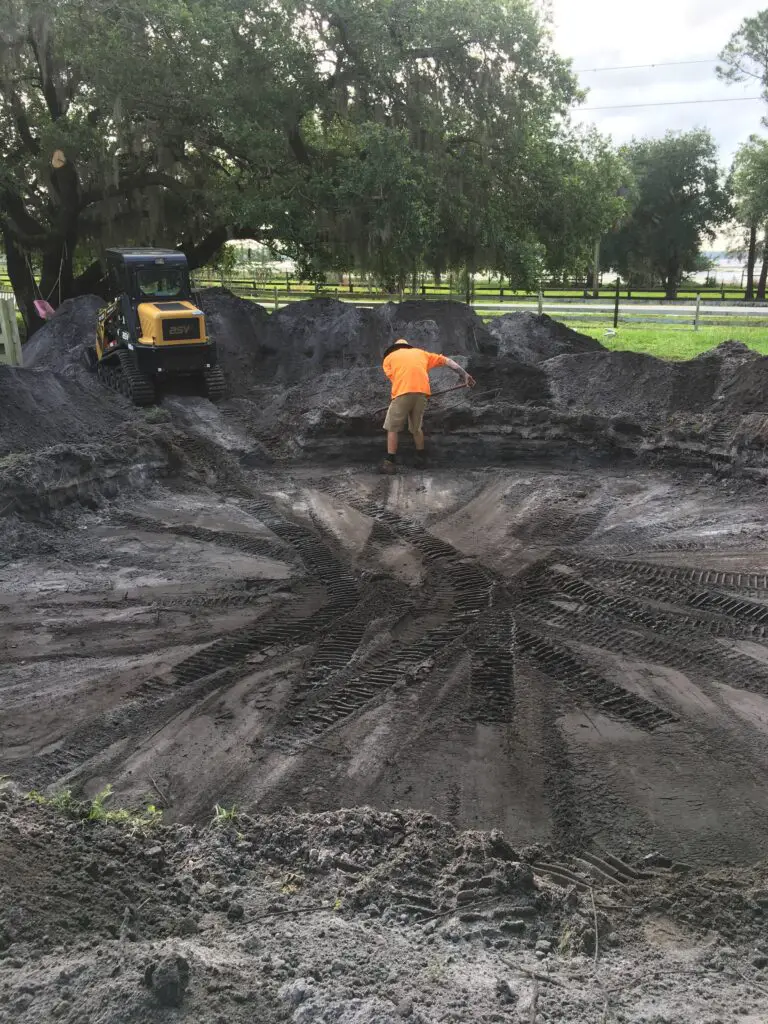
A skid/steer machine (known better as a Bobcat) type is the premier device for removing grass and leveling earth for an above-ground pool. I own and use one for just about every install.
For most leveling their yards for a pool install, a Bobcat is not necessary. Some will absolutely need one. And then many will fall somewhere in the middle.
There are drawbacks to using a skid/steer machine for a pool install. I only recommend it if you have a more extreme situation. The drawbacks are the cost to rent ($200 plus for half day) and the potential mess the machine can make of the yard from the wheels/tracks.
Not being familiar with using a ride-in machine can unnecessarily tear up a yard (from the tracks/wheels) and damage things in the way. Small skid/steer machines are fun to operate but there is a learning curve to it, so don’t expect it to go smooth at first. And be careful not to hit anything with it.
I recommend renting a machine if your earth is very hard (rocky/ hard clay) and/or you have a lot of grade to the yard. You will need to have wide enough access to the yard for the machine and a clear path to the pool install site.
FINALLY – STEPS TO LEVELING THE SITE FOR AN ABOVE GROUND POOL
1. Mark Out Where the Pool is Going
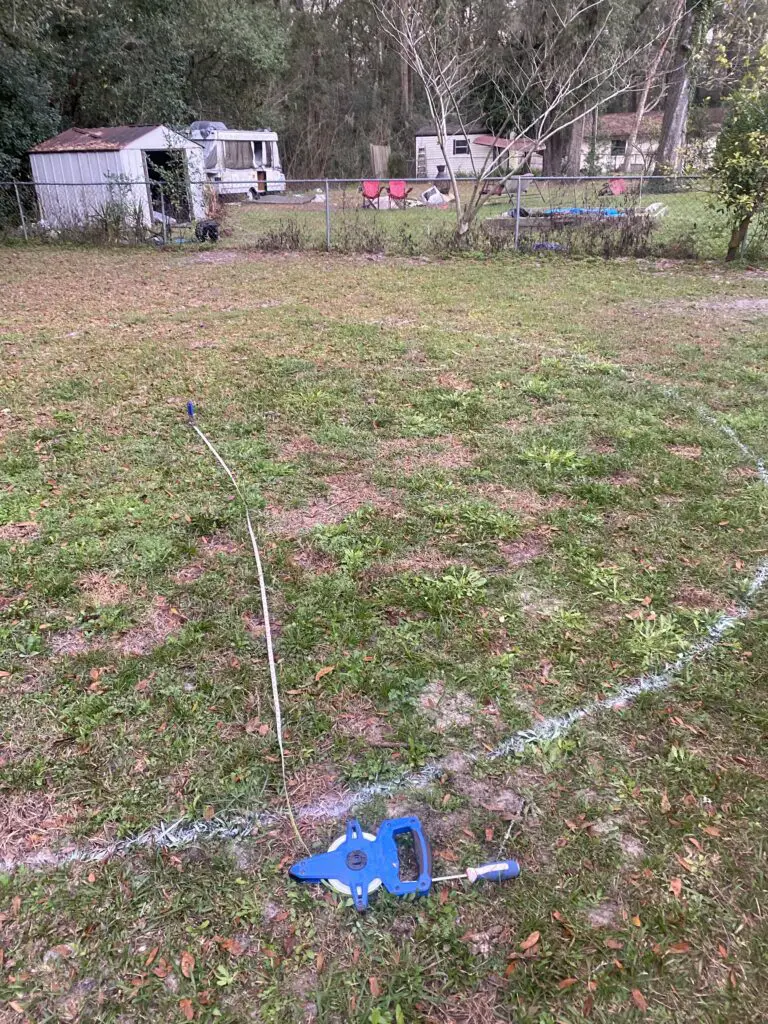
It’s easier when you know exactly where the pool is going and how much ground (earth) you have to level. With an above-ground pool, you’ll want to level one foot bigger than the size of the pool.
As an example, if you have a 24’ round pool, you will want to level a 26’ area. This is one foot bigger than the pool all the way around it.
Find the middle of where the pool is going and stick a long screwdriver in the ground. Attach a tape measure to the screwdriver and spray paint a circle to the correct size.
Using the same example, for a 24’ round pool, go out 13’ from the center (where the screwdriver is) and spray paint the circle. This will give you a 26’ spray-painted circle exactly where the pool is going.
NOTE: For oval pools, it will be harder to mark out the site. Just make sure you have the site sprayed out at least one foot bigger plus the buttress dimensions (on the straight sides) all the way around.
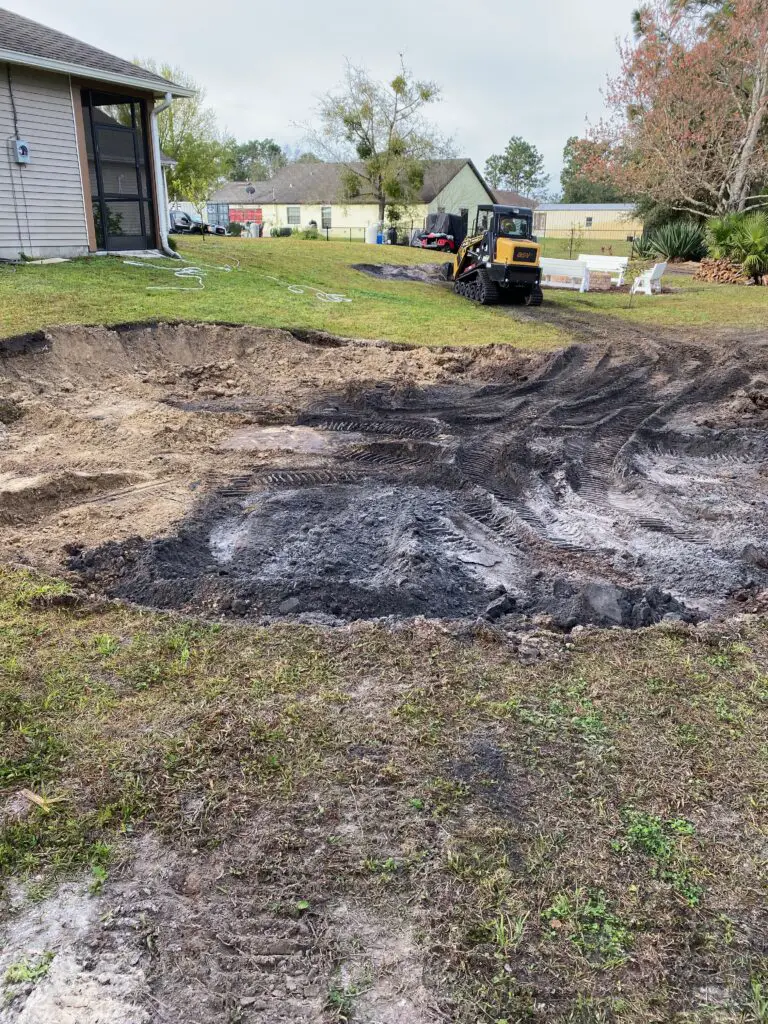
2. Remove the Grass (Sod)
Using a shovel or a sod cutter or a skid steer, remove all the grass from the painted-out pool site. You are removing the grass plus its root mass (sod), so it will be at least four inches thick.
Get all the sod out of the pool site. Use a rake to clean up any leftover small pieces and remove them. The pool site should now be only ground (earth) and no grass at all.
3. Determine the grade
This is a key step so don’t skip it!
Using your level, determine the grade of the area that you just removed the grass from. It’s rarely perfectly level at any given twenty-foot span of the planet. It might look dead flat, but it’s most likely not.
You want to know what the difference is between the highest part of your pool site and the lowest.
What do I mean by this?
Using the above example again, let’s say that you are installing a 24ft round pool and have removed a 26ft circle worth of grass/sod. This bare circle in the yard (with no grass) is not level. When you look at it, the earth is clearly higher in the part of the circle closest to the house. Then it “slopes” downward from there as it gets farther from the house.
This “slope” that you are visibly seeing is the grade of the pool site and you need to know what it is in inches.
Using your level (whichever one you have), you will need to know how many inches lower the elevation of the circle is from its highest point (closest to the house) to the very lowest point (farthest from the house). This will be your grade in inches.
Learn how to determine grade here.
4. Dig from the High Side and Throw to the Low Side
So, you’ve done step 3 and found out how much grade or off-level your cleared site is. Now it’s time to level the earth out. You do this by transferring some of the earth (dirt) from the high part of the site to the low side.
As an example, let’s say that the site is eight inches off grade. This means that there is an eight-inch difference from the highest part of the pool site to the lowest. With this, you would dig out approximately four inches from the high part of the site and throw it over to the low part.
Digging down half of the grade amount from the high side and adding it to the low side will even or level out the entire site. With the above example, you would be removing four inches from the high part and throwing on the low side, which will add about four inches to its height.
DON’T BELIEVE THE HYPE. YOU ABSOLUTELY CAN BUILD UP THE GROUND (EARTH) FOR AN ABOVE GROUND POOL
In your internet information travels for installing an above-ground swimming pool, you’re most likely will find some people saying that you can’t raise the ground any for a pool install. Yeah, that’s not accurate!
During the 35 years and counting that I have worked on above-ground pools, I have installed more than six thousand of them. And with most of those, I elevated the ground at least a couple of inches on one side.
With some installs, I raised the low side by more than two full feet and never had any settling issues ever. I’m not recommending that you build up your pool site that high as it takes a couple of extra steps, but you can certainly raise up your pool site by 6-8 inches with no long-term issues whatsoever.
Now, if you choose not to believe me and don’t want to level your pool site by using the ground (earth) that is there, then by all means, start from the lowest part of the site and dig all the earth that is higher out of the site.
This will leave you with the site being level everywhere to the lowest original grade(where you started). It’ll also leave you with a lot of extra dirt and a much sorer back.
5. Access your Earth
You may have to do this step before you can level out your site (step 4). All pool sites are different. There are different types of earth and different things that can be in the earth.
The ground can be anything from super-soft pure sugar sand to hard clay to rocky. In some areas, the ground will be too hard for you to dig and make level. When too hard to dig with a shovel, you will have to either rent a big machine that can move the hard earth OR bring in some earth and build up the area to level.
This is part of your assessment.
You are also assessing what is in the ground. After removing the sod, are there a lot of roots from a nearby large tree? Are there a lot of little rocks in the earth? Irrigation lines? Was there something in the ground long ago that you have run into like an old septic drain field? Was it an old trash burn site
Assessing the earth from your pool site and what’s in it will determine whether or not you will need to bring some sand or earth in. You also may determine that you have to dig out some bad earth and put the pool lower in the ground.
If you have large roots, you may need to get a reciprocating saw or chainsaw to cut them out. Or you may need a pickaxe to pry out large rocks. Yikes!
Assessing your earth will allow you to make the decisions needed to get the job done. And that job is to have a level piece of yard big enough to hold your size pool and workable enough (debris-free and soft) to install it on.
6. Finish Leveling and Prepare the Site
At this point, you have leveled the site by either moving the earth around (from high to low), removed the earth from the lowest part across, or brought in sand or dirt to level your too-hard/dirty ground.
Now you will do the finishing touches on the leveling. Re-check the grade of the site to make sure you are now level to within one inch. If still off more than that, then do more leveling by moving the dirt around (from high areas to low areas).
Once level to within an inch, you can start making the area smoother. Do this by going over it with (hopefully) a wide landscaper’s rake turned upside down. The wider the rake, the smoother you will be able to get the site.
Go over the entire site with the upside-down rake over and over again picking out any rocks or sticks or anything sharp out of the dirt. Move the rake from the center point outward in a swirl, then move the rake from end to end in different directions. Each pass with the rake will allow you to make the future pool bottom smoother and more level.
Occasionally water down the site and then upside-down rake it again. Watering down the dirt will expose rocks and unwanted things for easier removal AND take some of the air out of the dirt/sand which will allow you to make it smoother.
CONGRATULATIONS! YOUR SITE IS NOW LEVEL
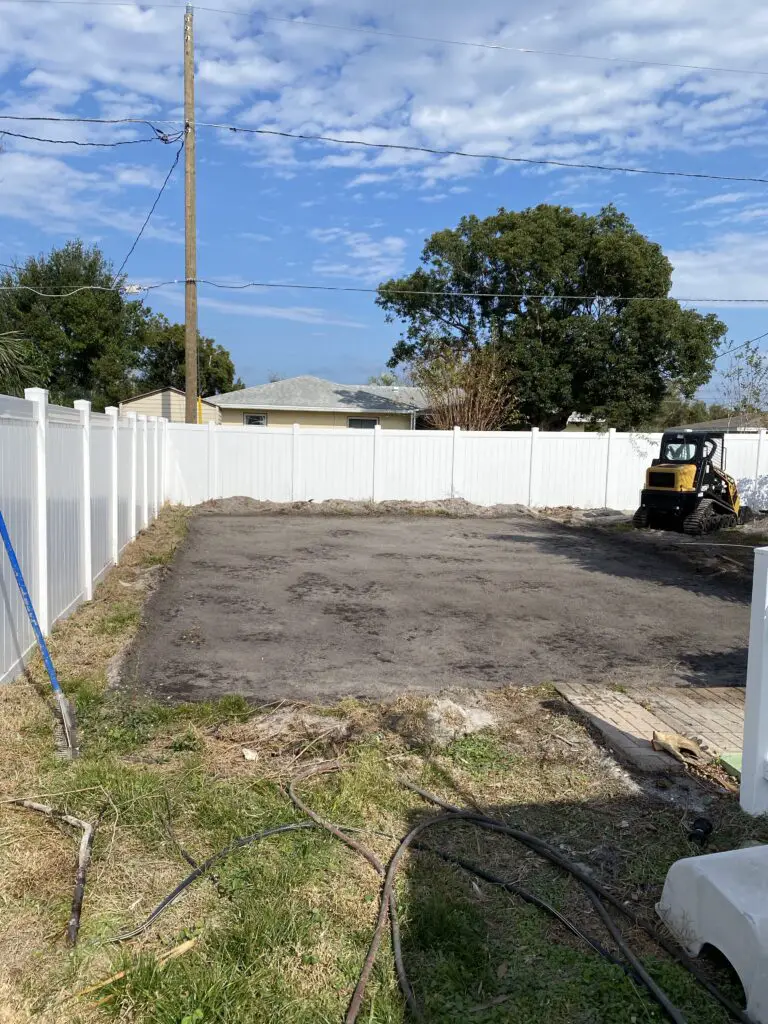
If you have successfully removed the sod and got an area of the yard where you want your pool one foot bigger soft/workable and level to at least one inch, then you are ready to install the pool on it.
If you are installing a soft-sided (Intex/Coleman/Bestway) type pool, you should be able to install directly on what you just did. I would probably want it to be closer to one-quarter to one-half-inch level though, but one inch off is perfectly ok.
When installing a metal-walled above ground, this stage will just be the beginning. You will be leveling the bottom track using blocks to set it perfect. And then leveling the ground to the track. This will be a lot easier now that you have a nice, clean, workable level site.
Yard is excavated but still need some fine tuning. All super packed hard clay that is like trying to dig in a concrete slab. I don’t have any earth to rake. Plan is to use enough sand to smooth if we can get level within an inch. If I have to bring dirt in to level is topsoil ok to use? If so do I have to tamp it? The clay that was dug out is mostly all big clumps of clay so cant really use it to level.
I prefer clean topsoil over sand, so yes it’s ok to use. You don’t have to tamp it, but to make the bottom level, you should wet it down a couple times, then smooth, repeat. This will remove some of the air in the material (sand/top soil) which is essentially packing it.
Ok, if have to add topsoil, do I still need to add sand to make it smooth? I have the Rhino pad as well.
For clean topsoil, you do not.
Ok, so retaining wall is finished, and we have to fine tune the leveling (hopefully the excavator can get it with in an inch).
1. The earth here is all clay and is extremely hard and difficult to dig, do you have any suggestions on getting the blocks set in the the ground and level?
2. Since Im in an area with expansive clay and now on top of it, do I need to worry about the blocks moving?
3. Since the last few days of building the wall, given the hot weather, no rain, and the skid steer back and forth on it, the top layer of clay has dried and cracked. Is this something that I need to be concerned with?
3. We are 2 feet deep on the high side, and our frost line where I am can be between 20 and 30 inches (I’m on the line of these two numbers according the frost line maps that are out there) I know your in Florida and may not have the answer, do I need to worry about frost heaving?
Hi, I have spent 2 months, while in a wheelchair, leveling the ground for my 18′ above ground swimming pool. I put 12″ x 12″ pavers at each post. Using a water level, all pavers are within 1\16th” of my first paver. Now I am trying to get the ground underneath the tracks to be perfectly level and compacted for the tracks to have support. Is it necessary to do this?
It is good that all of your pavers are the same level. 12″x12″ are huge and a pain as they have to be leveled in two directions (side to side and front to back). As long as you’ve done that, it will be level.
The entire bottom of the pool does not have to be perfectly level. Only around the wall of the pool and where your pavers are. If this is a metal-walled pool, then that is easy as you can level the earth around the inside perimeter of the pool after the track is laid down and BEFORE the wall goes up and in the track.
If this is a soft-sided pool, then get the earth between the pavers to be level with the pavers along with at least a foot inward all the way around. The pool’s uprights should then sit nicely on the pavers and at the same level of the earth, which won’t affect the pool’s bottom.
I had pool area professionally removed. In 19’ there was around 1.5 to 2 feet of dirt to remove, high to low. They took out a lot of dirt. I then had them bring in class 5 and then an inch or so of sand on top of that. Not perfectly level. I wish I would have fine tuned their level. I have a 17’ x 29’ Splash Super Pool on top of it. No problems since I installed it in 2009.