
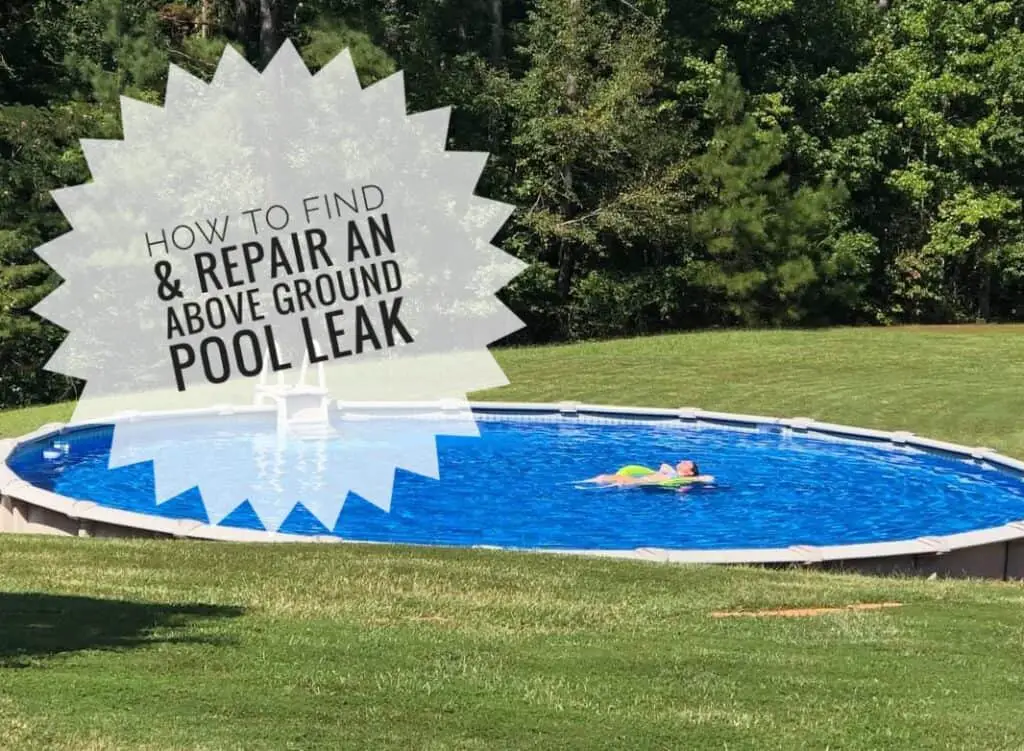
It just sucks when your pool is losing water. You want your pool to be your getaway from the stresses of life. And when it has a leak, it becomes one of those stresses.
Finding a leak in an above ground pool requires dye, a mask, something to weigh you down, and a lot of patience. Once found, repairing the pool leak is easy.
WHY YOU SHOULD REPAIR A LEAK IN AN ABOVE GROUND POOL SOONER THAN LATER
Having a leak in a swimming pool is common and something most people can live with. With in-ground pools, having a leak and not repairing it is not a great idea, but besides having to deal with more algae and spending more on chemicals, there’s not much effect on the pool.
An above-ground pool is different in this respect. Allowing an above ground pool leak to continue over a long period of time can cause the wall of the pool the begin to rust. And once corrosion begins, it doesn’t stop.
In my now 37 years of working on above ground swimming pools, my opinion is that a leak in the pool at the wall is the number one reason pools die from rust. So, if you have a leak, get it fixed.
THE MOST COMMON PLACES WHERE AN ABOVE GROUND SWIMMING POOL LEAKS

Easily, 90 times out of a 100, an above ground pool leak will be around the skimmer or return fitting.
With a vinyl-lined above ground pool, you have a liner that holds all the water. And that liner usually only has two openings in it. Those two openings are the skimmer (where the water comes into the pump) and the return (where the water goes back to the pool from the filter).
These two openings in the liner are made when the pool is installed and are the only cuts in the liner anywhere. And these openings are sealed by gaskets and screws which can sometimes fail or be installed poorly.
If you suspect your above ground pool has a leak (and you are, or else you wouldn’t be reading this), then before you get crazy, look around the outside of the skimmer and return fitting where it connects to the pool wall.
If you find a drip or a stream, you found the leak. It now has to be fixed by replacing or re-doing the seal made by the gaskets. Do not think you can fix it by pasting some silicone or putty around the outside. Knowitall tip: You cannot re-seal or fix a leak correctly from the outside. It must be fixed from within.
15 STEPS TO FINDING (and then repairing) A LEAK IN AN ABOVE GROUND POOL
If you find the leak during any of these steps, stop and go to the “how to repair the leak” section at the bottom.
1. Inspect the skimmer and return fitting
As stated above, if an above ground swimming pool has a leak, ninety percent of the time, it’ll be at the skimmer or return fitting. Look closely where the skimmer and return meet the pool’s wall for any moisture.
If you do find a leak at the skimmer, try tightening the screws at the faceplate on the inside of the pool. If you have a wide-mouth skimmer, there will be eighteen screws and for a square skimmer, there are ten. Tighten them all very tight, then re-inspect for a leak.
If you find a leak at the return fitting, use a big adjustable wrench and tighten the big plastic nut located on the outside of the fitting. It should be pretty tight but not enough to cause the gasket to bulge out too much. Then re-inspect for a leak.
This re-tightening of the screws is the easy fix. If you are still leaking, then it will require taking the skimmer or return off. You may consider getting at least new gaskets for it. I will have an article detailing how to repair a leaking skimmer and return later.
2. Verify if your pool is leaking
This may seem strange, but people are funny. Some will get it in their heads that their above ground pool has a leak and you can’t convince them otherwise. This was annoying when I had my pool maintenance company and had the same customers for years of weekly service.
It can be frustrating to think your pool has a leak when, in fact, it doesn’t. This is more common than you might think, so just humor me on this and make sure your pool is leaking.
FOUR WAYS YOUR POOL CAN LOSE WATER OTHER THAN A LEAK
1 Evaporation – This is the number one deceiver with thinking you have a leak but don’t. Evaporation happens everywhere and depending on what time of year and where you live, happens at different rates.
The rate of how much pool water is lost by evaporation is based mainly on how dry the air is. I live and work in Central Florida. Here, it’s very humid in the summer and when it’s humid, the air has a lot of moisture. The more humid (moisture in the air) it is, the less evaporation there is because the air already has water in it.
Now, when the air is very dry, like in a place like Phoenix, Arizona, you will have a high amount of evaporation. The air is dry, so it’s going to draw moisture wherever it can get it. If there’s a swimming pool, then the air is going to grab water from it.
I’m explaining this because the rate of evaporation will be different at different times of the year. In Orlando (where my pool service business was), it was rainy and humid in the summer, and then we would have less rain and dryer air in the fall.
Because of this, it was very common for pool owners to think they had a leak every fall because that’s when it stopped raining(which fills a pool) and the air was dryer(increased rate of evaporation.
HOW MUCH WATER CAN A POOL LOSE TO EVAPORATION? This depends on how dry the air is. In Orlando, Florida, in the driest conditions, I have recorded as much as one-quarter of an inch of evaporation per 24 hour period. In a place like Phoenix, the rate of evaporation can be up to one-third of an inch per day.
Taking evaporation into consideration then, your pool can naturally lose as much as a couple of inches a week without it having a leak.
2 Splashing and swimmers exiting the pool – Don’t underestimate the amount of water that a pool can lose from excessive splashing and people getting out of the pool. An adult swimmer can pull out as much as four gallons of water every time he exits the pool.
Most adults don’t go in and out of the pool or splash around much, but kids sure do. If you have a lot of kid swimmers, consider that you may be losing a lot of water from this.
3 Siphoned out by the garden hose used to fill the pool – This will be hard to explain. Occasionally, a pool will need some water added to it. People will use their garden hose to fill the pool. When done filling, they may turn off the water spigot (the water fitting from the house), and leave the hose in the pool.
Now, since it’s an above ground pool, the end of the hose that is still in the pool is higher than where it’s attached to the spigot at the house or well. When the spigot is turned off, sometimes a siphon will be created and the flow of water will reverse and go from the pool to the spigot and you will never know it.
The pool will then lose water, so the pool owner will turn the water back on to refill and then turn back off when filled leaving the hose, once more in the pool. After a while, the pool owner will think there’s a leak.
Knowitall tip: After filling the pool with a garden hose, remove the hose from the pool to prevent a potential siphon
4 Poor family communication – This may sound like it’s not a real thing, but you’d be surprised at the number of times I’ve had customers think their pool is leaking, only to find out that while they were filling the pool, someone else in the household was draining it down.
Before thinking you have a leak, check with anyone in the home that has the ability to drain the pool and make sure they’re not draining it down.
3 Determine how much water the pool is loosing
This is an important beginning step so don’t skip it. The bigger the leak, the easier it will be to find, so it’s important to know what you’ll be looking for or even if you have a leak at all.
- Turn the pool pump off and allow the water to get still.
- Mark the water level with something that won’t smudge or easily wipe off.
- Wait exactly 24 hours and mark the new, lower level.
- Repeat this and make a mark for at least 4 days.
- Measure the difference between the marks and that is how much water you are losing per day.
Note: The rate of water loss can lessen as the pool’s level gets closer to the level of the leak. This is from less water pressure.
4 Inspect the pool’s equipment
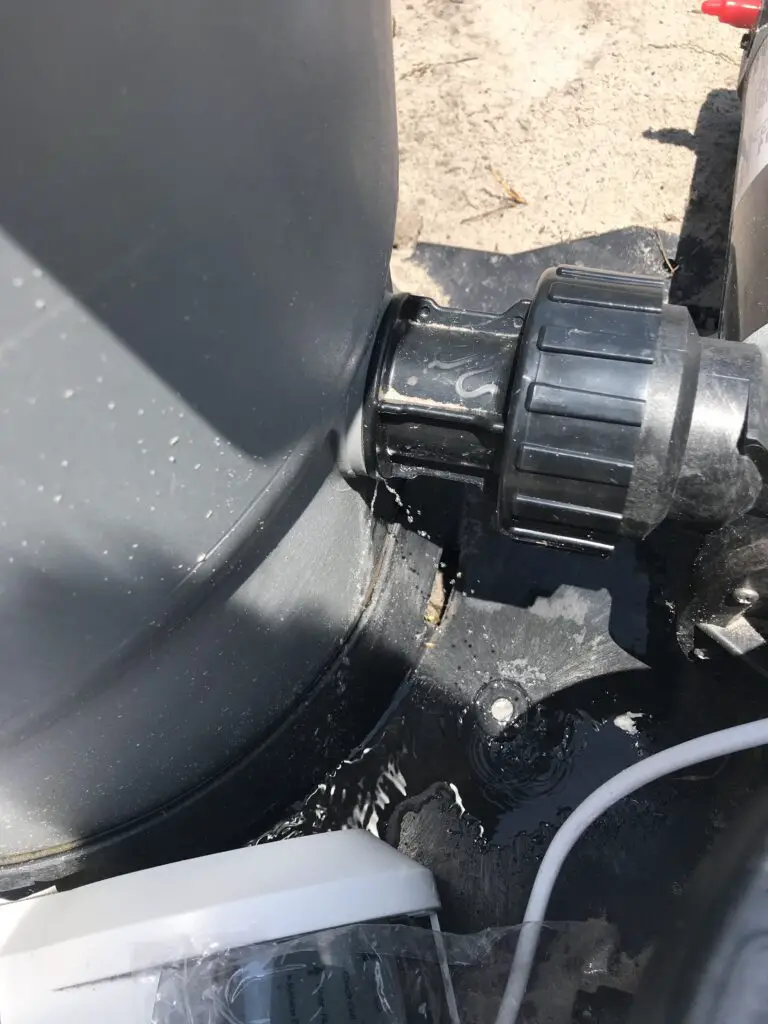
The second most common area an above ground pool leaks is at the equipment.
Turn the pump on and very closely inspect the hoses or PVC piping going from the pool to the pump and filter. Inspect the pump, filter, and any add-on components for the pool.
Get down on your hands and knees and look closely underneath the pump and filter area for any moisture. If there is any grass or dirt around the equipment base, clean it all up so you can see moisture better.
If you see any moisture anywhere, take a towel and dry the area to see if it gets wet again. If it does, look closer to see where the water is coming from.
Also, inspect the pool wall all the way around. It’s somewhat rare but holes do get made in the wall for different reasons. And some of these holes are in the liners too.
5 Feel the inside of the pool’s wall
From the outside of the pool, reach in and press your hand against the inside of the pool’s wall about a foot below the water level. Press and feel the liner against the wall in areas all the way around the pool.
What you are feeling for here is if the liner feels padded or cushioned against the wall. If an area feels more padded than the other areas of the pool wall, then that may indicate a leak somewhere between the liner and the wall.
As the leaked water finds its way into the ground, some of it will get slowed down or trapped in between the liner and the inside of the pool’s wall. This layer of leaked water between the liner and wall will feel like a cushion or padding.
Note: If your pool had wall foam installed, then you most likely won’t be able to feel any leaked water as the foam padding will make the wall already feel cushioned.
6 Uncover and expose the pool’s bottom track on the outside.
Often times, if there is a leak somewhere in the wall of the pool or around the wall bottom, water will leak out around the bottom track. Make sure the bottom track of the pool is completely visible all the way around and closely inspect for moisture.
If you do find any moisture in the track, it may be there from rain or splashing. Keep an eye on it for a couple of days to see if it dries up. If not, that could be a sign of a leak.
If you do find water in the pool’s bottom track in some area around the pool, It may be where the water is leaving the pool, but not necessarily where the pool is leaking. Typically, leaking pool water is exiting out of the bottom track will travel along until it finds the lowest point of the track and exit there. This could be on the opposite side of the pool, but not usually.
Now that you may have found water leaking from the bottom track, use it as some evidence as to where the above ground pool leak may be and proceed with the following steps.
7 Inspect the pool’s floor
From the outside of the pool and with the pump turned off and the water very still, look down at the pool’s bottom. Look for any divots or valleys.
When a pool has a leak at the bottom, the leaking water can sometimes displace the earth underneath the liner leaving a concave dip of some kind. If you see any divots or valleys that weren’t there before, That may be where the leak is.
Make a note of what you see and where and continue to follow the steps.
Note: Finding any divots of any shape or depth doesn’t mean it’s a leak. The bottom may have settled or moles could have caused this. The earth is a dynamic place with life that moves around.
8 Vacuum and clean the pool
It’s now time to get into the pool to look for the leak. It’s extremely helpful for the pool to be clean of any debris and the water quality great with clear water.
If the pool is dirty, then you may miss out on finding the hole because a leaf or dirt may be in the way of you seeing it. Also, cloudy pools are tougher to see in and slimly pools are tougher to find leaks in.
9 It’s time to look for a leak in the vinyl liner. Here’s what you need:
It’s time to now get in the pool and look for a leak in the liner. This won’t be easy but will be a lot easier if you have a couple of things.
- A dive mask or swim goggles
- A dive weight belt or something heavy to keep you down in the water
- A syringe needle or applicator of some kind filled with food coloring or any dye
10 Turn the pump off and get in the pool
You are now in the pool with a weight attached to you(to keep you down in the water), a good mask (to see underwater), and an applicator or syringe full of dye.
Don’t move around much. You want to keep the water very still.
11 If the liner is a year old or less, inspect the seams of the liner and dye anything suspicious
In the last several years, I haven’t seen many seam separations in above ground pool liners, but it does happen. Lately, about one in every two hundred liners will get a seam rip or separation.
If your liner is newer, I would check the seams of the liner for a rip first. There will be a seam that runs near where the pool floor meets the wall, one or two seams that run across the floor of the pool, and usually one vertical seam that connects with the bottom seam and runs all the way up the wall.
Go along every inch of the seams and look for a hole or tear. If you see something, shoot some dye around it to see if the dyed water draws into it. If you find a hole or tear at the seam, congratulations. You have a seam separation.
Seam separations usually cannot be patched successfully. A patch may hold for a little while, but seam rips usually continue to get a little bigger over time, which means the patch over it won’t hold for very long.
Note: Seam separations are covered under the manufacturer’s warranty, but don’t expect much. If the liner is less than a year or two, you may get a free replacement liner, but that’s it. You’ll still have to pay to have the liner changed out, the lost water, and any extra chemical cost. (More on liner warranties here)
12 Next, inspect any divots or indentions on the pool bottom
Any area of the pool bottom that has an indention, a trough, or any dip that looks suspect is the next place to look for a hole. Get up close and personal as some holes are very small. Shoot dye around anything that may look like a hole. If the dyed water draws into the hole, then that’s a leak.
13 Very slowly go over the liner in the whole pool, shoot dye anywhere that looks suspicious
Now that you haven’t found the leak in a seam or anywhere there is a divot in the bottom, it’s time to look everywhere else. My best advice here is to not be in a hurry.
I’ll be honest with you. The likelihood of you finding a leak at this point is small. Leaks that are just anywhere in a liner are usually not found. Your best chance to finding it though is by looking over the liner very, very slowly and methodically making sure you cover every inch of the pool.
It’s helpful here to manage your breathing and have something that keeps you weighed down in the water so you can stay longer at the bottom of the pool while looking for the leak.
14 If you can’t find the leak, let the pool drain down
If you have done all the above steps and never found a leak, then it’s time to just let the pool drain down and stop adding water.
You’ll probably have to turn the pump off because it can’t run when the water level is below the skimmer (unless you have a main drain). It may take several days for the pool to drain down to where the leak is.
Whatever level the pool stops draining, that is where the leak is. This means that if the pool stops draining halfway down, then the leak is on the wall somewhere at that level.
If the pool drains all the way down, then the leak was at the floor somewhere. Note: If you don’t want to replace the liner, don’t allow the pool to drain all the way down. If it does, the liner will shrink and you won’t be able to re-fill
Letting the pool drain down is a last resort and is usually only effective if the leak was in the wall somewhere.
15 If you find a leak, it’s easy to patch with an underwater patch kit
Did you find the leak in the liner? Congratulations! That’s a big deal. Now fixing it is the easy part. Here is what you need:
- Underwater patch kit (preferably Boxer brand)
- Utility knife or scissors
- A quarter or something round shaped
HOW TO PATCH A VINYL LINER IN AN ABOVE GROUND POOL
- Get in the pool with a mask and preferably a diver weight belt(or something to keep you from floating up)
- locate the hole in the liner and mark (you want to be able to go right to it), come back up.
- Open the underwater patch kit
- Using a quarter or something round, cut out a round piece of the clear vinyl from the patch kit.
- Glue on side of the round piece and fold in half.
- Go down into the water to the hole, unfold the piece of repair vinyl and press it glue side down over the hole in the pool liner.
- Continue to press down and in place until it sticks well over the hole.
- Come up from the water and have a beer. You’re done.
16 If you could not find the leak, replace the liner
This is really your last option. Well, you could just keep adding water to your leaking pool, but when it comes to an above ground swimming pool, that’s never a good idea.
Leaks that make the wall wet on the inside of an above ground will cause it to start rusting. A pool wall can be wet from a leak for a week or a month and not be a problem. But if you allow the wall to stay wet for an extended period of time, it will begin to and continue to rust. That is not good.
It’s unfortunate and unfair to have to go through all the expense of changing an entire pool liner just because it has a small leak. But for many situations, there’s really no choice. And if your liner is 5 years old or older, then getting a new liner is an even better idea as liners start to get brittle when they get older. This means that even if you did find and patch a leak, there will be more to come soon.
I’m glad you talked about the importance of detecting a leak and repairing it on time! Recently, my wife and I moved into another house, and it came with an above-ground pool. We want to make sure the pool’s in good condition before we start using it, so we’ll be sure to look for a professional’s help. Thanks for the advice on how pool leaks could lead to major rust issues!https://www.poolpowerservices.net/spa-repair/
If you are too late and now have a rust hole on the side of the above ground pool is it “dead” or can/should you still try to fix it?
It depends on the hole and where it is located. Until I finish an article specific to this, you can read the following https://abovegroundpoolsknowitall.com/help-theres-a-hole-in-my-metal-above-ground-pool-wall/
Hi Dan, I ordered a patch kit as you suggested.
I’d like to know what you can use to clean the liner before patching. I used Waterproof gorilla glue tape and that held for a few months but is not coming off. There is residual glue on the liner I need to remove before using the proper patch. (The pool is not drained).
Thanks
If this is an underwater patch job, then just wipe away any debris that may be in the way. You should be good after that.
I tried two different underwater, patch kits, and neither one of them stock worth a damn What’s the best thing to do? I am started draining it down. Do I pull off the old patches and clean that up somehow ?
If you have a metal walled pool with a vinyl liner, then Boxer brand underwater patch kit is what I use with great results. If a soft-sided pool, then I Don’t know what is best.
I have tried everything above to find my leak and have not been successful. Have you ever tried fix a leak and let the filter run and recirculate
Sorry. I don’t understand the question.