Chances are you found this article because you are wanting to put an above-ground swimming pool on an existing concrete patio.
Using your existing concrete slab to put a pool on was a great idea at first, but then there was a problem.
TWO REASONS THAT YOU DECIDE TO BUILD A SANDBOX FOR AN ABOVE-GROUND POOL
1. You discover that your concrete patio or slab is off-level
Most existing concrete patios are made off-level. This is so rainwater can travel off of them. They aren’t off by much, but it’s more than enough to not be able to install an above-ground pool on it.
Since a swimming pool has water in it, it has to be very level
Most things can stand or be built off-level and it doesn’t matter too much. Water stays level though regardless of how tilted whatever is holding it is. This is why a pool must be level along with the water it’s holding.
2. You bought a metal-walled OVAL- shaped above ground pool
Round-shaped above-ground pools sit on one plane. They have a bottom track that the wall fits into and that’s it.
Oval pools though have a more complex design than round pools as they sit on at least two planes or levels. They have a bottom track just like a round pool but also have a buttress structure that lies a couple of inches lower than the track.
This means that you cannot easily install an oval pool on a concrete slab.
WHAT IS A SANDBOX FOR AN ABOVE-GROUND POOL, ANYWAY?
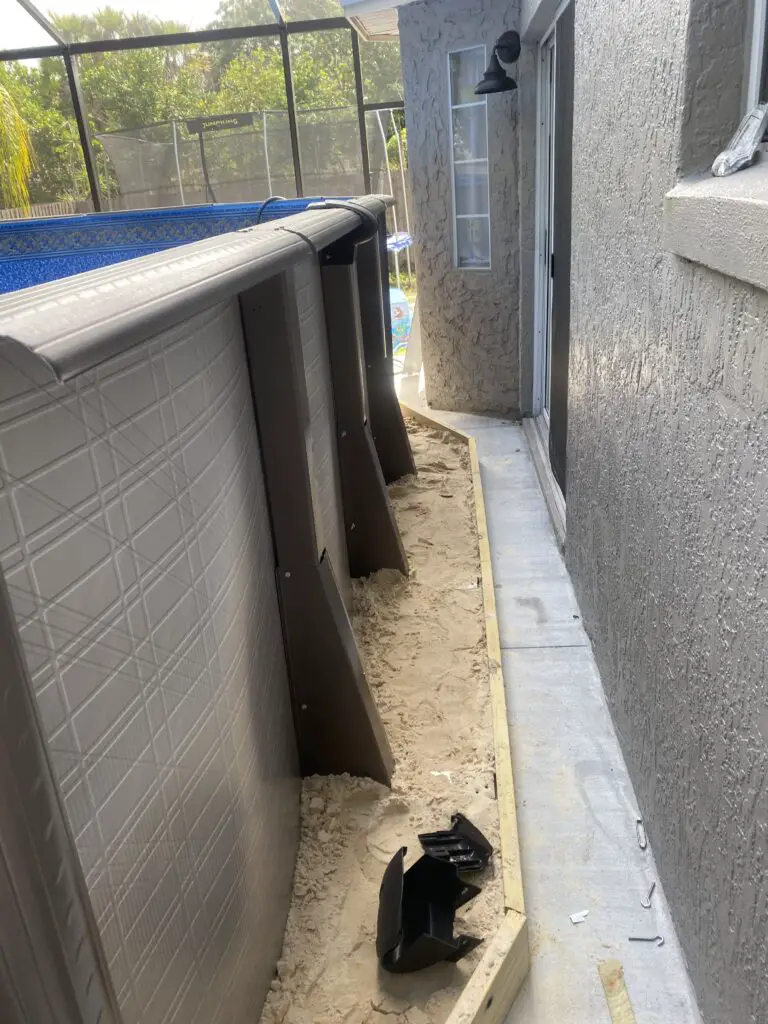
If a homeowner wants to put an above-ground pool on their existing concrete patio slab, but it is off-level(which it usually is), then they will build a barrier that can hold at least four inches of sand.
This barrier that is usually made out of pressure-treated wood is filled with sand and will be big enough to hold the size pool that they want to install.
With a barrier filled with sand and big enough to hold a particular sized above-ground pool sitting on top of an (off-level) concrete patio, you can now install a pool perfectly level on top of it.
MATERIALS NEEDED TO BUILD A SANDBOX FOR AN ABOVE-GROUND POOL
- This is not a hard job and there aren’t many materials needed.
2. 2×6 OR 2×4 pressure-treated wood
3. Quality or stainless steel screws
4. Support brackets
5. Weed block
6. Tons of sand or clean earth
TOOLS NEEDED TO BUILD A SANDBOX FOR AN ABOVE-GROUND POOL
1 Circular, chop, or miter saw
2 tape measure
3 (cordless)drill with screw fitting AND wood drill bit
4 Hammer or corded drill with Tapcons and correct size concrete drill bit
5 utility knife
6 pencil
7 tee square or rafter square
8 stapler
HOW TO BUILD A SANDBOX FOR YOUR ABOVE-GROUND SWIMMING POOL
1. Assemble the pool’s bottom frame
In order to get your sandbox exactly the shape, size, and location that you want, it’s best to know exactly where the pool is going first.
When setting a pool up on concrete, the first thing you do is set the bottom track, so this isn’t an extra step or anything.
For ROUND pools – take out the bottom track pieces and make a circle by connecting them with the bottom track connectors. Set it exactly in the place that you want and make sure it is round.
For OVAL pools – To do this the proper way, you will want to assemble the buttresses at this point. Once assembled, set the buttresses in place and connect them in the way that they are designed (This is normally by the water plates and straps)
NOTE: There are different oval designs and each one has different buttress dimensions.
When all of the buttresses are connected together by the water (bottom) plates and across by the straps, you can now square them to each other. This is done by cross-measuring and adjusting until the measurement is the same.
Now that your buttresses are in place and squared, you can add the radiuses on either end. This will be using simple track pieces and connectors (like a round pool).
Square each radius (half-circle) to the buttress structure on either end. Now your bottom track is in place with the buttresses sticking out from the pool.
2. Determine which patio stones to use for leveling
To make your pool level, you will need to use blocks or patio stones under each connector plate (and two for each buttress if oval). I recommend thin pavers or concrete cap blocks for this as they are thinner than other patio stones.
3. Determine how much depth you will need to make the pool level
What I mean here is that since the concrete slab is off-level or you have an oval (the reason that you need to build a sandbox to begin with), you want to know what it will take to make the pool level when sitting in the sand.
Place a leveling block under a connector plate at the highest point of the concrete slab. Using a level, record the height of the track at that point (This will be the “lowest” point of the track in relation to the slab).
This will be the level of your pool!
Find the part of the pool track at the lowest point of the slab. Place a leveling block underneath it and use some sand to raise it to the same level as the connector plate at the highest point of the slab (the one you originally did).
Now that you have what the bottom track height will be at the lowest point of the slab, measure up to see how thick the sand will have to be.
An example of this is if you are using a leveling block that is 1.5 inches thick, then the bottom track of the pool will be at least 1.5 inches off of the slab. Now, if the slab is three inches off (between the highest point of where the pool is going on it and the lowest), then the level pool will be 4.5 inches higher than the slab at its lowest point.
With this example, you will need at least a five-inch deep sandbox.
NOTE: Some sandboxes can be built using 2×4 material if the slab isn’t off much. In most cases though, a sandbox will need to use 2×6 wood to make a deeper sand base.
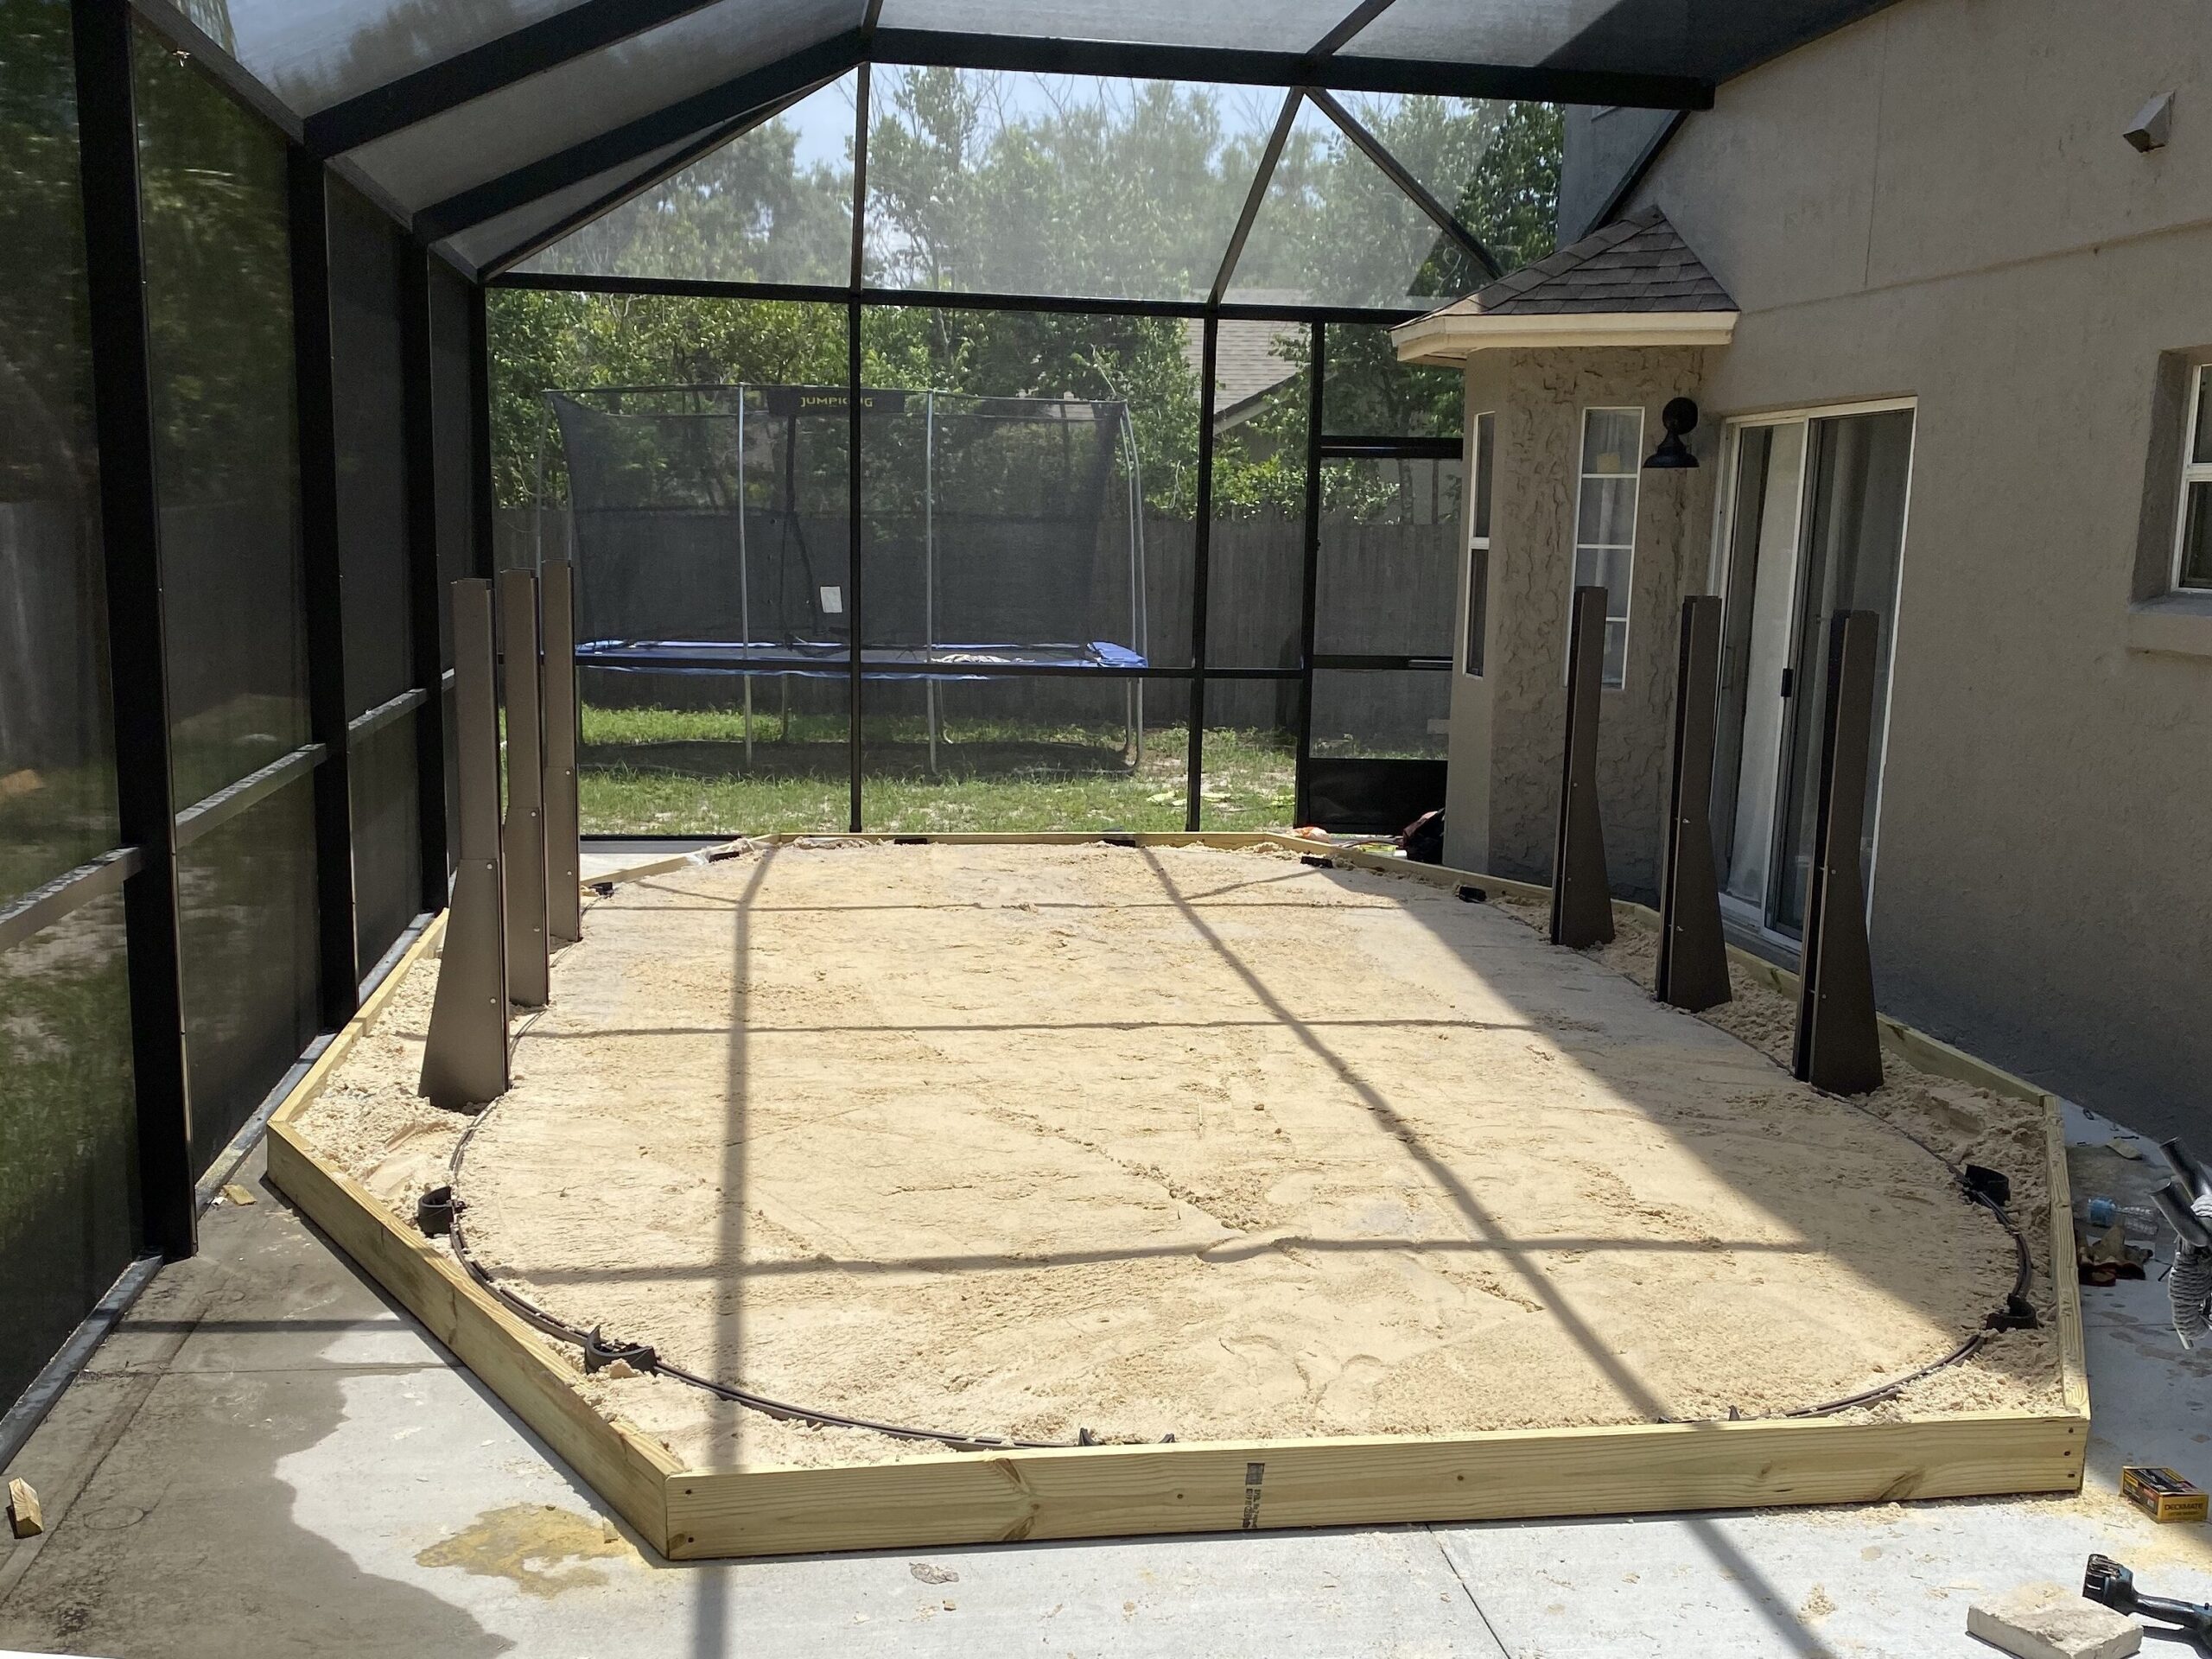
4. Plan your design for the sandbox
If you did the prior three steps, then your pool’s bottom track is exactly where the pool is going and you know how thick the sand needs to be. You can now decide how you are going to shape the walls of your sandbox.
Depending on how much room you have and how you want the sandbox to look, you have some options on how to shape it.
For example, if the pool is round and you have a big enough slab, you may elect to make a simple square shape to hold the sand in. This will leave a bigger area of sand away from the pool on each corner of the sandbox
You may want to keep your sandbox about a foot away from the round pool all the way around. To do this, you will need to make several sides for it. An example of this would be making a giant octagon-shaped sandbox around the pool.
If an oval pool, you can design a simple rectangle to hold the sand in OR custom cut more corners at the long ends of the pool to keep it closer to the pool’s radiuses and look cooler.
5. Buy the wood and materials
With knowing how big and what shape you want your sandbox to be, it’s time to buy the materials for it.
You can use any material that you want to make the sides of the box that will hold sand. For the sake of keeping it simple, I recommend using 2×6 pressure-treated wood.
This is an easy job with the exception of one part – cutting angles on the ends of the 2×6 wood pieces.
Go to the list above and get what you need at the hardware store.
6. Cut pieces and lay out
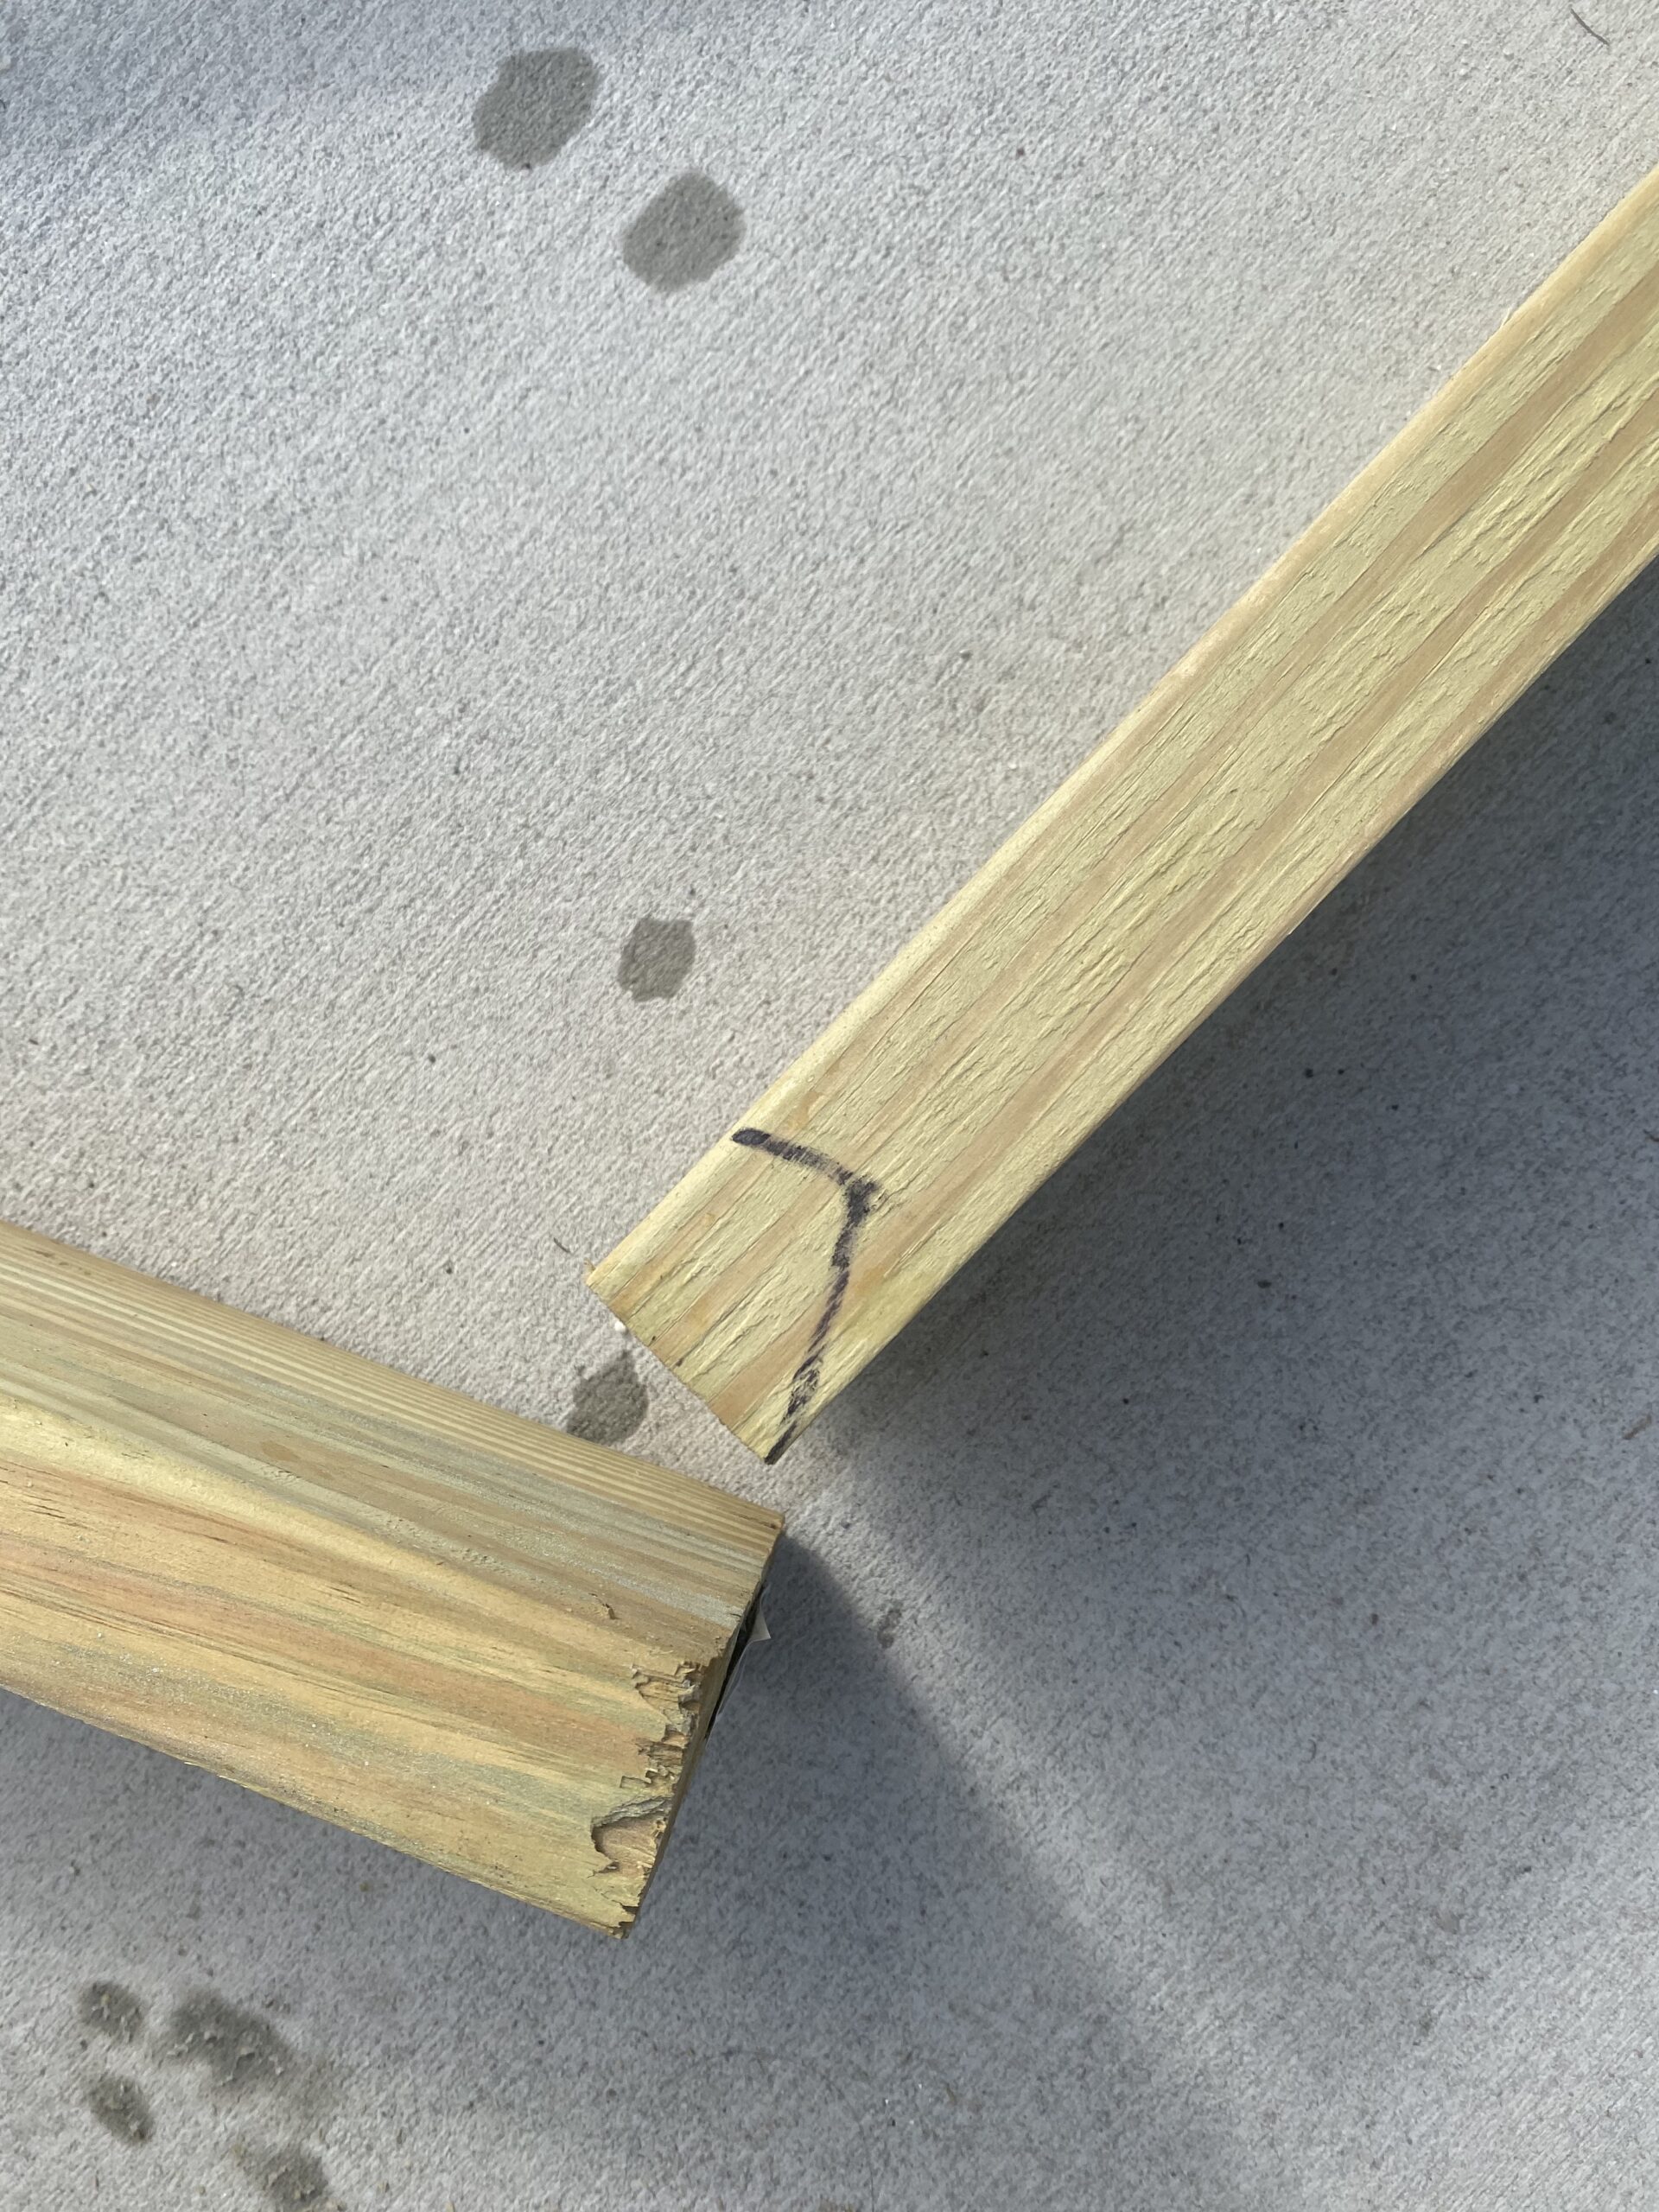
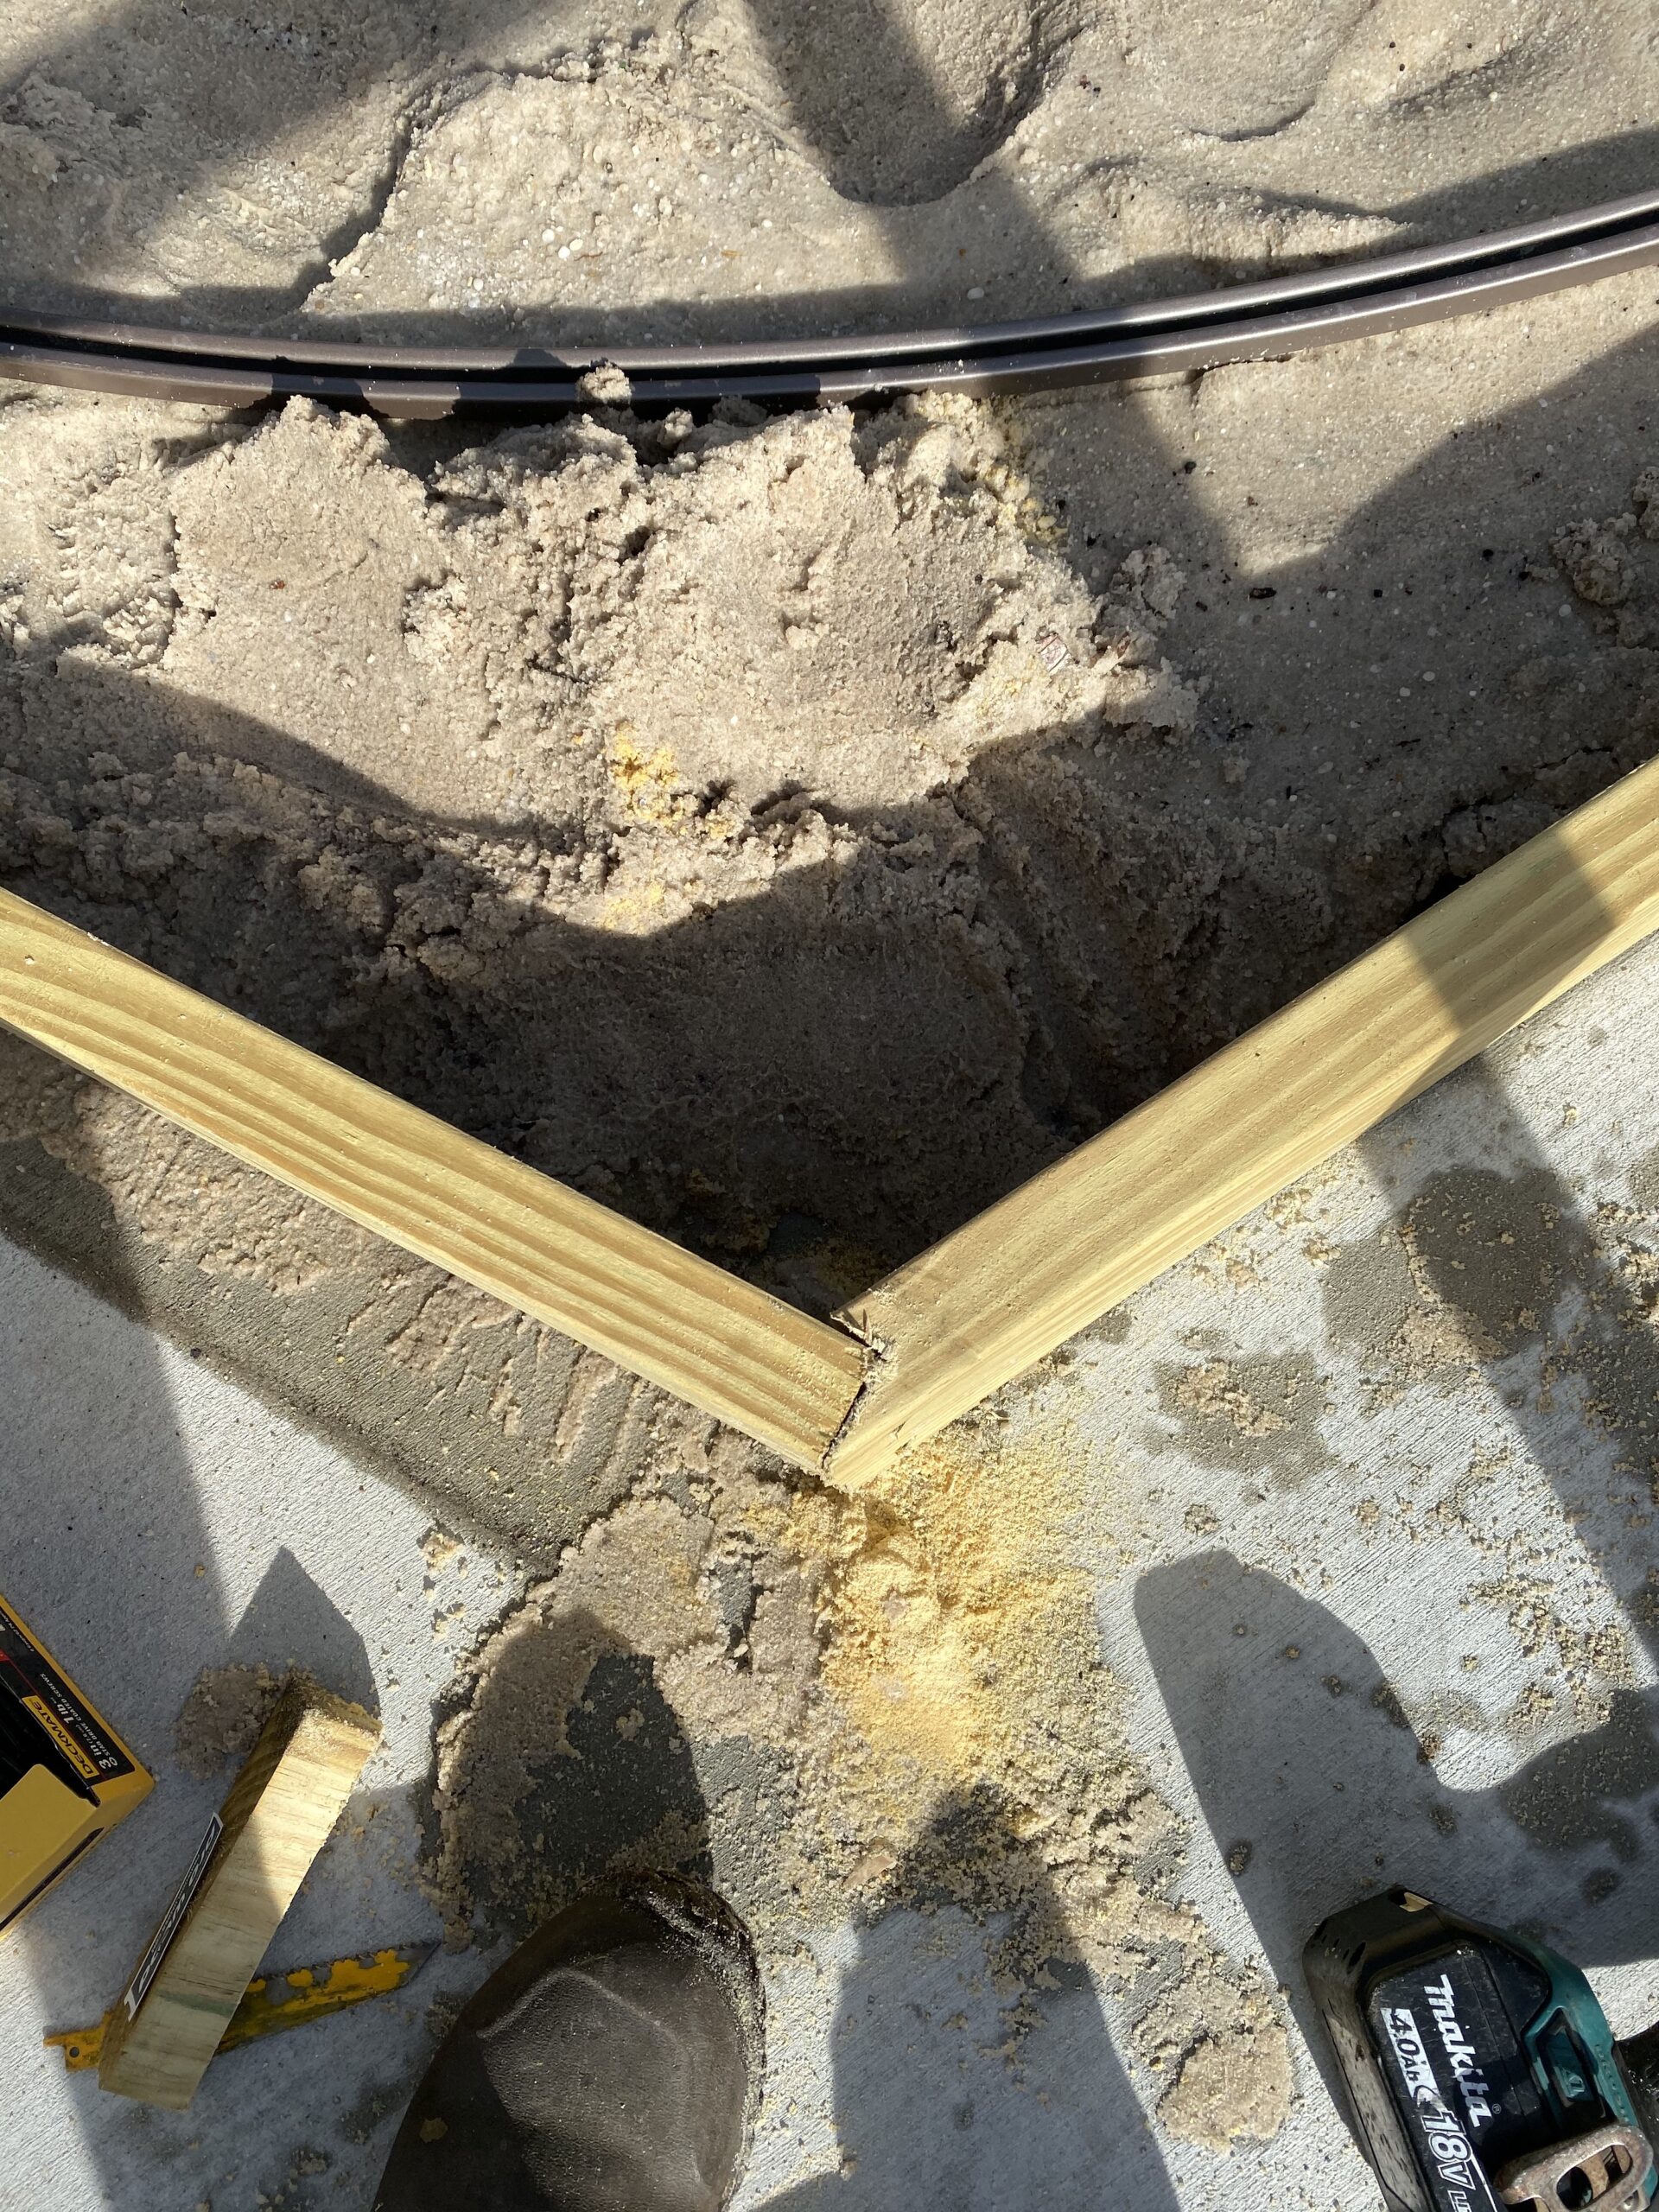
Let’s say that you are putting up a round pool and have decided to make an octagon-shaped sandbox. This means that you will have eight pieces of 2×6 wood all the same length, which is the easy part.
It also means that you will want to cut both ends of each piece at an angle so the pieces butt up together evenly with no gaps. For this, you will have to figure out the angle that needs to be cut AND be able to cut those angles with whatever cutting saw you have.
If making a simple square sandbox, then you don’t need to cut the ends at an angle, which makes it very easy. Any custom shape with more than four sides will require some angle cuts.
After making the cuts, lay out the pieces to make sure they fit well together and around the pool.
7. Screw pieces together
NOTE: Do yourself a big favor and use good-quality deck screws for attaching these wood pieces together. The extra few bucks will be worth it both when you are assembling the sandbox AND if you ever have to take it back apart.
Line up the first two pieces of wood. Now use your drill with a wood drill bit (smaller than the size of your screws) and drill two holes through both pieces of wood where the screws will be going.
Drilling starter holes is an extra step that some of you will choose not to take. That’s cool with me. Be you. Personally, I like having pre-drilled holes to prevent the screws from going in at the wrong angle AND/OR preventing the screws from splitting the wood.
Now, screw the deck screws in the two pre-drilled holes. Your first two pieces of wood for your sandbox are now attached.
Repeat these steps until the sides of your sandbox are all attached all the way around.
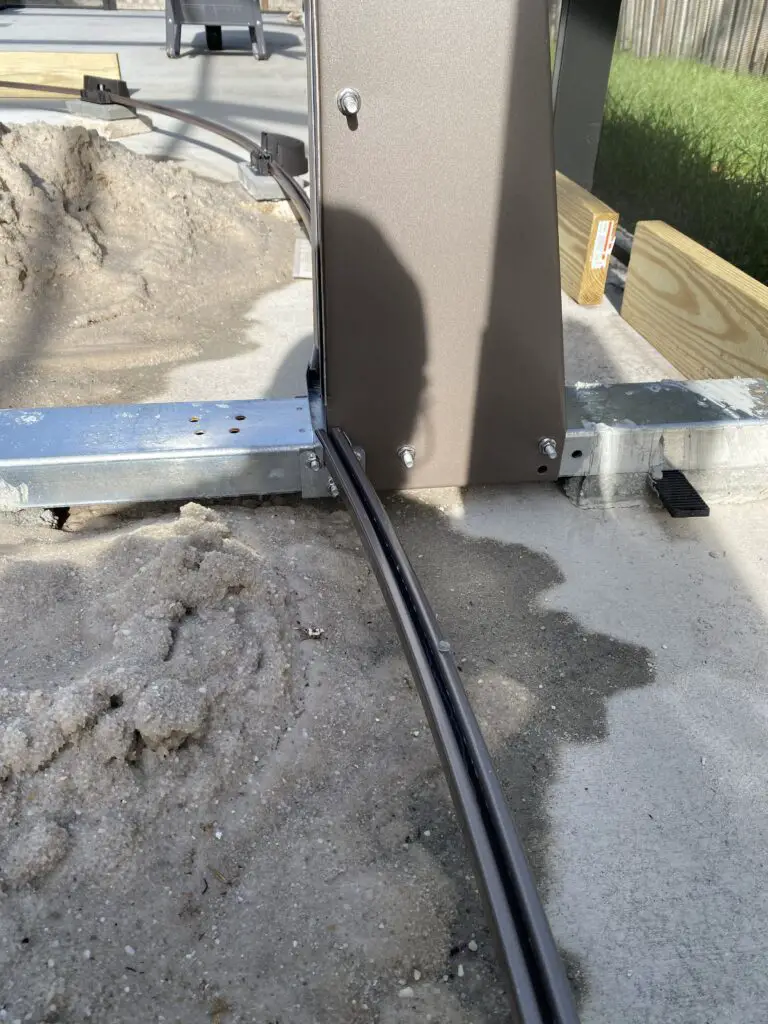
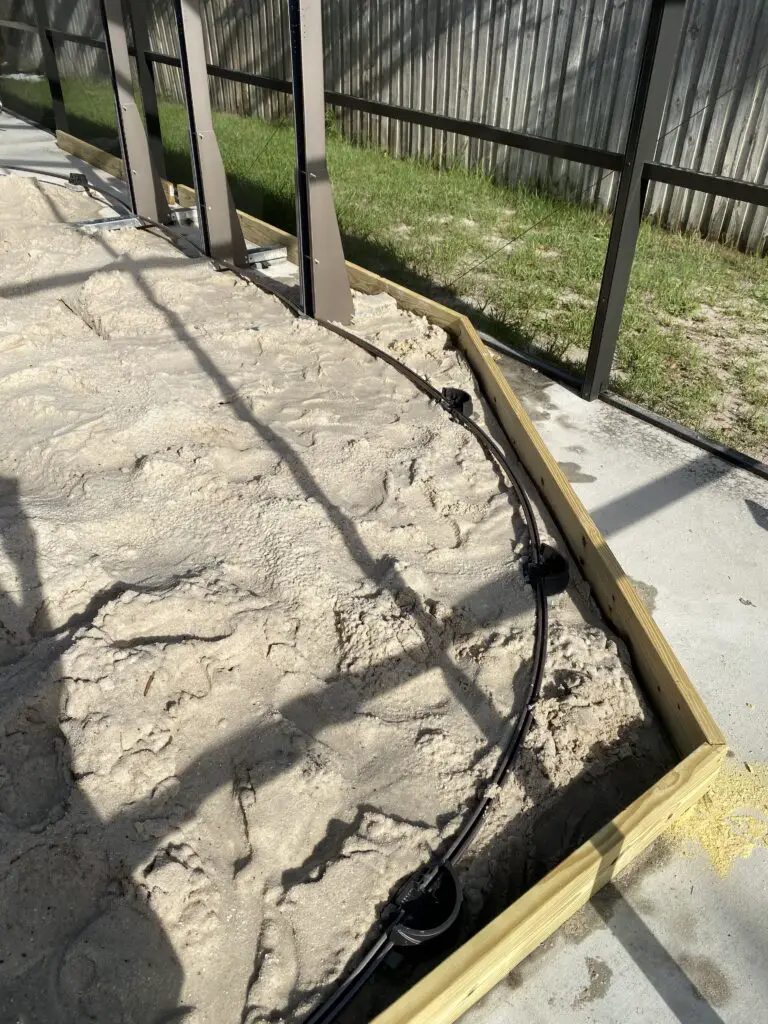
8. Use angle brackets to reinforce the sandbox
At this point, you have a 2×6 pressure-treated wood frame surrounding the bottom track of your above-ground pool.
By itself, the wood frame will hold in the 4-5 inches of sand that will be covering the inside. Over time though, the wood frame may bow outward and not look straight.
To prevent this from happening, you will reinforce the sides of the 2×6 planks by screwing angle brackets to them and the concrete floor.
How many angel brackets you want to use is up to you. If you aren’t sure and want to make sure it has enough, then plan on adding an angle bracket about every two feet around your sandbox.
You will want at least two-inch angle brackets. These will have a total of four holes in each one. Place the first angle bracket where you want to start them and on the OUTSIDE of the sandbox.
NOTE: Installing angle brackets to the outside of the sandbox frame is recommended over installing them inside of the box as are then much stronger at keeping the frame from bowing outward.
Mark the holes with a pencil or marker and remove them. Now use your corded drill and the correct size concrete drill bit and drill one or two holes in the concrete at your marks. This may not be easy.
When the holes are made, replace the angle bracket over the holes and screw the Tapcons into the concrete. Now screw the bracket to the wood with wood screws. Your first angle bracket is now in place.
Repeat these steps with each bracket at about two feet apart all the way around your sandbox. When done, your 2×6 frame will be attached to the slab and very strong.
NOTE: You may need more than one concrete drill bit as they don’t last long drilling into a concrete slab.
9. Staple a strip of weed block
In most cases, the sand will not escape from under the 2×6 frame or at the joints, but not always. And it can be annoying if you get even a small amount of sand around the outside of the box.
To help prevent sand from coming out, cut about one foot wide strips of weed block (or some other mesh material) and place them on the inside of the wood frame and the floor next to the frame.
I use a stapler to keep the weed block in place on the inside of the wood.
NOTE: Don’t use a solid poly material for this like Visqueen or plastic sheeting for this. You don’t want to trap any moisture. You only want to trap the sand.
10. ADD the sand
Congratulations! You’ve completed the frame of your sandbox. You are now rewarded with the back-busting task of hauling (probably wheel borrowing) in a bunch of sand.
If using a wheelbarrow, decide where you want to enter the box and build up a temporary ramp so the barrow can go over the 2×6 frame.
This will be a mentally easy part of this project but will be physical as you will need a lot of sand which means a lot of trips with a wheelbarrow.
HOW MUCH SAND WILL YOU NEED?
In most cases, your sandbox will need a lot of sand. So much that buying 50lb bags at Home Depot will not be worth it. You’ll most likely need to buy sand in bulk.
Buying sand in bulk used to be easier than it is now, so before starting this project, work out how and where you’ll be getting your sand.
More than likely, you’ll be buying sand in bulk by the yard. Sometimes they call it a ton, but I think “yard” is the more accurate term.
So how much is a yard of sand and how far will it go?
A yard of sand is a 3’ wide x 3’ deep x 3’ tall cube of sand
Square footage wise, a yard of sand then is 27 sq. ft. at one foot deep(3x3x3)
So let’s say that you need your sandbox to be four inches deep. Since you know that a yard is 27 sq. ft. at one foot (12 inches), then the get coverage of only four inches, then you’ll multiply 27 by 3 (1/3 of a foot).
This gives you 81 sq. ft. Of sand at four inches deep in a yard of sand.
HOW MANY SQUARE FEET IS YOUR SANDBOX?
If your sandbox is a simple square or rectangle shape, then it’s easy to figure out how many square feet it is. You just multiply the width by the length.
For example, if you have a square sandbox for an 18’ pool and it’s a 20’x20’ box, the 20 times 20 equals a 400 square foot area in your sandbox.
If you need your sand to be four inches thick and you know (from above) that a yard of sand equals 81 sq ft of four-inch-thick sand, then you will divide 81 by 400.
If you are still with me here, then your 20’x20’ sandbox will need about five yards of sand.
Figuring out the square footage of squares and rectangles is easy, if your sandbox is a custom shape, then you have to do the math to get a rough idea of how much sand you’ll need.
If you can, have bulk sand delivered instead of picking it up. A standard, full-sized pick-up truck will only hold about one yard of sand(or less), so you’re talking a lot of trips.
Even if they can only drop your sand in your front yard, it will usually be better than picking up sand one or two yards at a time depending on your situation.

That was an incredible description I was looking for hours on you tube for ideas.
Nothing came close to this article at all.
Thank you. I have an oval pool. 12ish by 16ish.
Removed all the grass n dirt and Just put cement on all my yard. Going to try your way. Didn’t think it was possible.
Only thing is. When the pool was taken down last year. There was a layer of something that seemed water proof between the sand layer and the pool liner. I actually saved a zip
Lock bag of it for future reference. Which is now….Almost Crystally material.
Thank you again. I think You would do very well with advertising if you made a you tube video.