In reality, the vast majority of above-ground swimming pools never come down or get taken apart until they rust and die. Some do have to get taken down for reasons like moving to another house, selling it, or upgrading to an inground pool.
Note: If you are looking for information on taking down a used ROUND above ground pool, then read this instead.
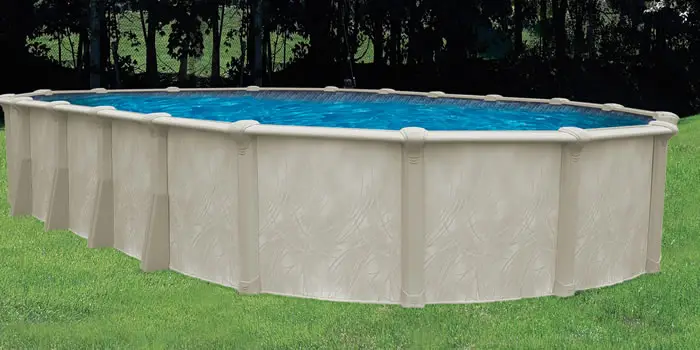
Every year, a few people contact me to take down an oval above-ground pool. In the world of do-it-yourself projects though, this is something most homeowners can do themselves. It’s not that strenuous, doesn’t take a lot of knowledge, and only takes a few tools to get the job done.
Oval-shaped above grounds are taken down to be re-installed less often than round shapes. An oval pool has a lot more parts, different length parts, and is much more difficult to re-install.
In the past 35 years as a pool installer, I have probably taken down a few hundred above grounds that were to be saved and re-installed. That’s not many compared to the more than a thousand I’ve taken down because they were no longer good (rusted out).
If you have installed as many pools as I have, you become very systematic about it. There are a lot of parts to an above-ground pool (especially an oval) and when those parts go together in a specific pattern, then the install goes much better and easier.
This is the case when disassembling an oval above-ground pool too. Being systematic is much better than being chaotic about it.
In this article, I am giving a step-by-step method of disassembling an oval above-ground pool.
TOOLS AND MATERIALS NEEDED TO TAKE DOWN AN OVAL ABOVE GROUND POOL
- Cordless screw gun and fittings (For most pools, you will need a #3 Phillips bit and a 5/16 hex head bit but not all)
- Ratchet and socket set (Most buttresses use 7/16 and 1/2 bolts)
- Large adjustable wrench
- Spray lubricant/penetrant (Like WD-40 or better)
- Large flat head screwdriver and hammer/rubber mallet
- Shovel
- 2 pieces of plywood to roll the wall on(or something similar)
- Utility Knife
- Hand truck
- Wasp spray (Wasps love to make nests in above ground pools)
- Small bags or containers (to hold the screws and smaller parts)
- Tape, small rope, or whatever is needed to hold the parts together
- Good space to store the pool (NOTE: Buttresses will stay intact, so they will need a lot of space if storing)
- Water hose (to clean some parts)
THREE THINGS TO KNOW BEFORE TAKING THE OVAL POOL DOWN
1. Decide whether the pool will be re-used or trashed – There’s a huge difference between taking a pool down that is going to the dump and one that is going back up somewhere.
If you are planning on trashing the pool, then it can come down a lot easier as you don’t have to worry about damaging, organizing, and making sure the parts are all accounted for. And you’ll most likely be using a hammer more.
If your plan is to re-install it elsewhere or sell it, then this will take more time and require more organization.
2. If planning on reinstalling the pool, check for rust – Rust is a big issue with above-ground pools. And it’s the number one reason a pool cannot be re-used.
Before going through the trouble of taking the pool down because you are selling or reinstalling it elsewhere, check everywhere for rust, especially the wall of the pool.
Unfortunately, the only way to really know if a pool is too rusty is by inspecting the inside of the pool wall. And the only way to see that is by draining the pool and removing the liner. And with draining the pool and removing the liner, you are pretty committed to finishing taking the pool down regardless of its condition.
In most cases, if the pool wall is in good shape, then the buttresses will be too. But not always. Buttresses, their water plates, and their straps a made of thick galvanized steel that holds up well against corrosion. But not always.
To check the condition of the buttresses and their parts, you’ll have to dig them up and inspect them after washing all the dirt off of them. I recommend doing this after the wall comes down.
3. Know that the liner CANNOT be re-used – I want to make this very clear. It doesn’t matter if the liner is brand new and has only been in the pool for a week. – The existing liner cannot be reused. Period
For about 30 years, I’ve had to argue this fact and really don’t want to anymore. Just take my word for it (even though you don’t know me lol) and accept the fact that a new liner has to be purchased.
Or you can always go ahead and reuse the existing liner and eventually learn for yourself. The result will be the same though. The pool will have a new liner soon after it goes back up.
26 STEPS TO TAKING DOWN AN OVAL ABOVE GROUND SWIMMING POOL
1. Drain the pool
The easiest way to do this is by poking a few holes in the bottom of the pool liner and allowing the water to slowly drain into the earth. You can use your pool pole to do this or anything else that will make small holes in the liner.
You can also use a sump pump or your water hose to siphon out most of the water.
2. Locate the wall bolts, remove the upright hiding them, and spray with penetrant
The wall bolts will most likely be fused with their nuts, so although this step is somewhat out of order, you want to get some lubricant/penetrant on the wall bolts and nuts as soon as you can.
In most cases, the bolts that connect the wall together will be hidden behind an upright closest to your skimmer/return openings. Remove the top caps in that area to get to the top seats.
Unscrew the top seats/rails so you can get to the top connector for the upright hiding the wall bolts. Remove the top connector and then remove that upright.
With that upright removed, the wall bolts are easily accessible. Spray them generously and repeatedly with a penetrant like WD-40. Let soak.
3. Remove all top caps to expose the top screws. Spray with lubricant
Just like the wall bolts, the screws used to connect the top rails to the top connectors may be rusty and fused. Spray them all with a penetrant and let them soak.
Gather all the pieces of each top cap, organize, count, and package them for storage or delivery. Some ovals will have different top caps for the buttresses (straight sides of the pool). Make a note of this and organize them separately from the other top caps.
NOTE: When removing the top caps, you may encounter some wasps nests. Have some wasp spray handy for this.
4. Get inside the pool and cut out the liner (in pieces)
Using a utility knife, cut the liner out piece by piece and toss it over the wall to be picked up and taken to the trash.
Even though the liner is thin and the pool has no water, it can be very heavy as sometimes the earth will stick to the bottom. Trying to keep the liner in one piece will make it much harder to move and dispose of.
5. Remove what is covering the wall bolts and spray bolt heads with lubricant
Now that the liner is out of the pool, you can access the wall bolts on the inside of the wall.
The wall bolts will be covered by something(to protect the liner from them). Most likely, it will be duct tape running from top to bottom. Remove the tape and spray the bolt heads with a penetrant. Let soak.
6. Cut PVC pipes or remove hoses, then remove skimmer and return fitting from pool wall
If your pool only has the plastic flex hoses connecting the pool to the pump/filter, then that’s easier. Take them off by loosening their hose clamps.
If you have PVC piping connecting the pool to your pump and filter, then you will have to cut the pipes and remove them from the skimmer and return fitting.
Now, remove the skimmer by unscrewing the screws on the inside of the pool. For a widemouth (rectangle) skimmer, there will be eighteen screws.
Remove the return fitting from the wall. Use a large adjustable wrench to loosen the remove the large plastic nut on the outside of the return.
7. Remove ladder or steps
Unscrew/unbolt if attached to the top rail and disassemble what needs to come apart depending on the model.
NOTE: Pool ladders are usually weighted down with something and/or full of water. Find any added weight(behind the steps) and remove. Remove any water in the ladder by tilting on its side.
NOTE 2: If the pool has steps that are full of sand, it may be too heavy to remove over the wall. If so, keep the steps inside the pool until you remove the wall. Then you can move the steps for storage or delivery.
8. Unscrew and remove all top rails
Now that you’ve allowed some time for their screws to soak in the penetrant, you can remove the top rails. Some may be rusty and hard to take apart. Be patient and hit with more penetrant if needed.
Gather all the top rails. Count, organize, and package for storage or delivery.
8a. Organize the different length top rails
Most ovals have different length top rails. You may notice that the top rails between the buttresses (straight sides of pool) are shorter. There can be as many as three different lengths of top rails
Radius top rails -The two rounded ends of the pool.Buttress top rails – The straight sides of the pool.
Transition top rails – The top rails where the radius of the pool meets the straight sides. If your oval has transition top rails, there will be four of them.
Every oval model is different regardless of who makes it. Some ovals will have only one length top rail for everything, some will only have to different lengths, and some will have three. Don’t assume anything.
Warning: Some top rails will appear to be the same length but are not. I have installed ovals with top rails that are only 1” longer than the others. Placing the wrong length top rails in the wrong place can make for a nightmare when re-installing the pool. Do yourself a favor and measure each top rail before removing and sort according to their length.
9. Remove any ground pad or foam bottom
Liner guards have become very popular. If you have one, it’s time to take it up.In many cases, the liner guard/pad cannot be reused. This is because earth, roots, and algae can attach to it and make it hard to use again. If your pad has a lot of stuff stuck to it, you can either let it dry and beat the sticking debris off of it or just fold it up and throw it away.
Liner pads/guards aren’t that expensive, so it may be better to just buy a new one(along with your new liner) than have to deal with the old dirty existing one.
If you have foam boards taped together for the pool bottom, now is the time to remove all of that. Foam boards are not usually reusable but will depend on their condition.
If the foam boards are misshaped or questionable in any way, do yourself a favor and just throw them away. It can be too much of a pain to try to reuse them.
10. Remove foam coving or earth coving
Foam coving has also gotten quite popular. In most cases, foam coving gets torn apart when removing from the pool wall, so don’t plan on reusing it.
If your cove is made from earth or sand, use a shovel and move the cove away from the pool wall. This will allow you to be able to roll the wall up later.
11. Loosen and take out wall bolts
It’s time to start taking the pool apart. The first thing to do here is to take the wall apart. This is an important step.
Taking an oval above-ground pool down is something one person can do but it is very helpful to have two people to get the wall bolts off. With one person on the inside of the pool and one on the outside, remove each wall bolt and nut.
Some of these bolts can be fused together (especially towards the bottom), so take your time and be gentle. You absolutely don’t want to strip any of them. If they aren’t coming off, stop, spray with more penetrant and wait.
NOTE: In extreme cases, some of the bolts won’t come apart and will need to be cut off. This is a pain to do but has to be done. It’s very important to not cut the pool wall when cutting off any wall bolts.
Once taken off, count, organize, and package the bolts, nuts, washers, and/or wall bars.
12. Secure one end of the open wall with shovel/s
It’s time to start rolling the wall up, but now that the bolts are not connecting the wall together, you have two ends of the wall exposed.
Using shovels( or anything that will keep the wall up and in place), secure one end of the pool wall upright. You do this so that end of the wall won’t fall down while you are rolling up the other end.
13. Unscrew and take off a couple of top connectors closest to the wall opening
In order to start rolling the wall up, you have to remove the top pieces of the pool frame.
You only want to remove a couple of them as you roll the wall though so the wall stays up everywhere except where you are rolling it up.
Take off a few of the top connectors in the direction of where you will be rolling the wall.
14. Remove top stabilizer bars, plastic coping, and/or bead channel closet to wall opening
Remove the rest of the parts that are on top of the pool wall. You are now ready to start rolling the wall up.
Warning: Some ovals will have different length stabilizer bars for the straight sides and transitions(see 8a). If they do, sort and store accordingly.
Remember to not take too many of these parts apart. If you take too many of them apart too far ahead of the roll, then the wall will start falling down.
15. Begin to roll the wall up and remove top pieces as you go
Lay down two pieces of plywood or something flat on the floor of the pool in front of the wall opening. Start rolling the wall in a somewhat tight circle.
Pull the wall out of the bottom track as you go. This can be tricky as the wall can get stuck in the track. You may have to shake the wall or even pry it out of the bottom track. When prying, be gentle.
As you roll the wall in a spiral, remove the top pieces as you go (step 14) Removing them as you go will make it easier to roll the wall without it falling down.
16. Remove uprights as you go
As you roll the wall up and out of the bottom track, the uprights of the pool will be exposed and trying to stand on their own.
Before they fall over, unscrew or pry them from the bottom connector plates as you go. Don’t do too many of them at once as they are helping keep the wall from falling too.
NOTE: The pool’s buttresses are the uprights of the straight sides of the pool. They do not need to be removed at this point, so they will stay up after the wall is removed.
Continue to roll the wall up by moving the plywood in place and removing the top pieces and uprights as you go (steps 15 and 16) and taking the wall out of the bottom track. The wall roll will move around the inside of the pool as you roll it up.
Do this until you reach the other end of the pool wall. Your wall will now be rolled up in a fairly tight roll. All of the top parts of the pool and the uprights will be removed.
17. When the wall is completely rolled up, secure the roll with tape or rope
The wall is now in a roll but needs to be secured. Do this by taping or roping all the way around the roll. This will make it easier to move.
Use a hand truck/dolly to move the wall. The wall will be heavy and awkward to move. It’s best to have two people when moving it.
18. Collect top rails, top caps, top connectors, top stabilizer bars, coping, and uprights
Group each part together organize, and package for storage or delivery.
19. Find all bottom track pieces and bottom connectors and spray clean with a water hose
At this stage, the only part of the pool that is left is the bottom track and bottom connector plates. It’s time to gather them up.
Ovals may have transition bottom track pieces and bottom track pieces between the buttresses that are different lengths than the bottom track of the radiuses. (SEE 8a)
Warning: It’s very important to sort and organize these different length (and potentially different curved) bottom track pieces. Placing them wrong while re-installing the pool will create a nightmare.
Since these parts can be in the dirt, it’s very important to make sure and find them all. You wouldn’t think that parts can get lost, but believe me, it’s super common to miss a piece of bottom track or bottom connector because it was hidden in the ground.
Once you have gathered them all, take them somewhere and wash them off using a water hose. These pieces can get caked with dirt, so cleaning them out is a good idea. And count these pieces over and over to make sure you get them all.
20. Group and package cleaned bottom pieces for storage or delivery
Congratulations. The pool is disassembled. Time to deal with the buttresses.
21. Dig out buttresses
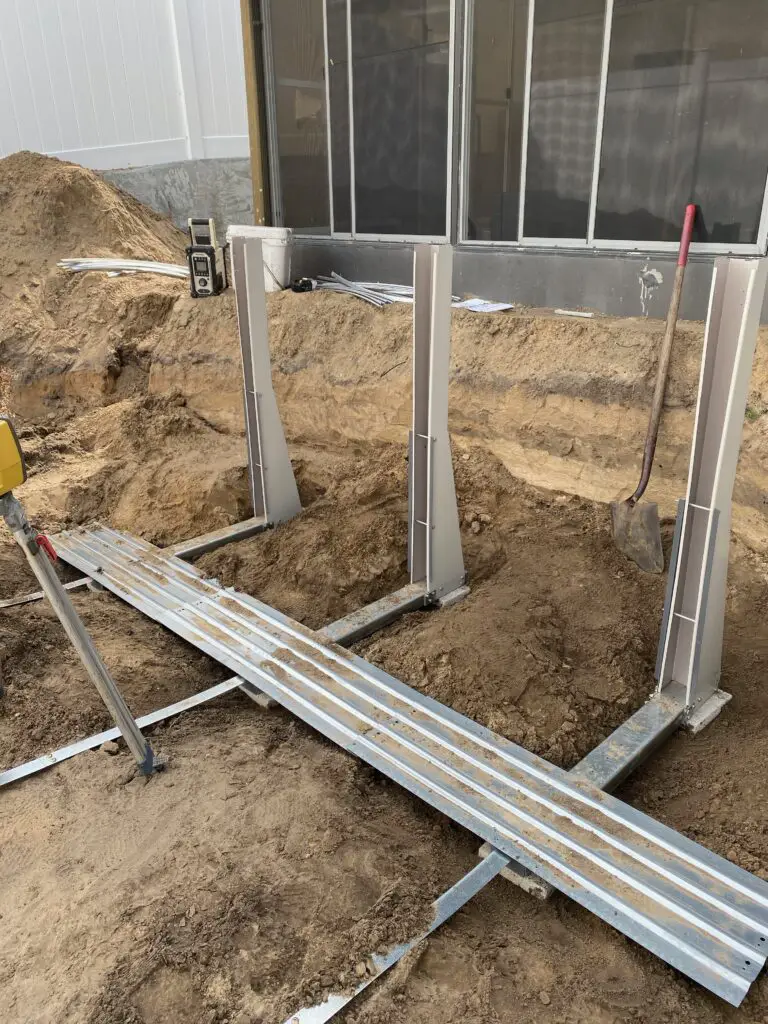
What you have at this point is a bunch of vertical structures sticking up where the straight sides of the pool used to be. Those are the buttresses and they are all connected. Using a shovel, dig around the buttresses to expose as much of them as you can.
22. Locate the water plates
Unearth and dig around the water plates. These parts are located in front of the buttresses and inside the pool under where the bottom used to be.
The water plates(they can be called something else too) are flat but corrugated rectangle pieces of steel buried just under the pool bottom and connected to the buttresses.
Dig these up enough to locate the screws that hold them together. Unscrew them from each other and from each buttress. Pull up, clean with a water hose, and store them with the rest of the pool.
These parts have been in the earth, so you may need to spray the screws that hold them with a lubricant to get them apart. There is usually one water plate for each buttress but not always.
Make a note or take a pic of how they connected to each other and the buttresses so you’ll know how to re-install them.
23. Locate the straps
Not all oval above-ground pools have straps but most do. Years ago (Did I mention that I’ve been doing pools for 35 years?) Doughboy pools didn’t have straps. Many do now and almost all Wilbar made ovals have straps.
If your oval has straps (it probably does), they will be connected to each buttress in the very front and slightly buried under the pool. Dig them up and unbolt them in at least one place.
The straps will be bolted together so you may need to soak the bolts in a lubricant before they decide to come apart. The straps are bolted in pieces. Take them apart and store with the rest of the pool.
NOTE: Some models of ovals will have different length straps. Measure the straps and if different lengths, organize and store accordingly. Also, make a note that the straps are different lengths for whoever is re-installing the pool.
24. Remove the buttresses
Buttresses are made up of several pieces bolted together. Fortunately, you won’t have to take the buttresses completely apart.
Now that you have the water plates (step 22) out of the way and the straps (step 23) removed, you can now remove each buttress. Using a shovel, pry each buttress up from the earth and remove.
Buttresses are heavy and awkward. It’s best if you have two people moving them. Take each one to a water hose and thoroughly wash them down for storage or delivery.
NOTE: Strapless ovals have concrete blocks (filled with concrete) behind each buttress to keep them in place. Do not try to re-use these concrete-filled blocks. Just get new ones for the re-install as it’s not worth the effort to reuse them.
Congratulations!! The oval pool is now completely disassembled.
25. Drain filter and pump of any water
This will make it easier to move.
26. Remove any PVC piping and keep for storage
If you have plastic hoses instead, take them off and keep them for storage or delivery.
27. Disconnect the pump from its power source
In most cases, this will just be unplugging the pump from an outside receptacle. If your pump is hardwired though, it will take removing some wires from a timer or power box.
If you have a timer or any other electric component, make sure to add that to the pool for storage or delivery.
28. Before transporting or storing, count each piece of the pool and make sure nothing is missing
Are you tired of me saying to count the pieces yet? Well, count all the pieces one final time to make sure. I can’t tell you how common it is for a piece or two to be missing with a used above-ground pool.
29. If storing, find a good clean place and store in an organized way
If you think for one minute that parts of a pool won’t come up missing while in storage, then think again.
Stored above-ground pool parts have a way of growing legs and walking away. Having a good clean storage place and storing the pool in a very organized way may prevent these things from growing legs and coming up missing.
And the longer a pool is stored, the greater the chance that something will come up missing. So, if your intention is to store for a long period, then store very, very well. It can be impossible to find replacement parts. Jus’ Sayin.
30. If transporting, make sure all parts go and are secure for the trip
By the time you load everything up, the pool will take up more space than you think. And it will be more awkward than you think too.
The pump and filter are very bulky and awkward. So is whatever ladder or steps you have. And these two things take up a lot of room in a pick-up truck or van or trailer.
Be more organized than you think you have to be when transporting a used above-ground pool. And secure everything well. Personally, I’ve had ladders and small pieces of a pool fly out during transport. And that really sucks.
ADDITIONAL NOTES, OBSERVATIONS, AND WARNINGS ABOUT TAKING DOWN AN OVAL ABOVE GROUND POOL
Sand filters are very heavy and awkward – I don’t like sand filters to begin with, but moving them can really suck. Use a hand truck and whoever is available to help.
In most cases, moving the sand filter will be the hardest part of the takedown.
Some ladders/steps are full of water. Drain as best you can – And with some of them, you can’t get all of the water out of them. Do what you can and drain them in any way you can figure out. It will make it easier to move.
Bottom parts can be easily missed. Count parts at least twice – Pieces of the bottom track and bottom connector plates are the most common part missing. Count, count, and count again.
For ovals there will usually NOT be the same number of top rails, top caps, top connectors plates, uprights, bottom connectors, and bottom track pieces – Ovals models are all different. Don’t assume anything. There may be different parts for the straight sides of the pool than the radiuses. And there may be transition pieces (from the curved part to the straight part).
See step 8a and the warnings of steps 19 and 14
Secure all screws in bags or containers. They can be misplaced easily – The good part here is that you can find replacement hardware pretty easily. But why have to when you can do what it takes to keep what was used.
The rolled pool wall can be very awkward to move. Move it to an area to clean any dirt still on it to make it lighter – While rolling up the pool wall, you may notice that some dirt will stick to it at the bottom.
Cleaning the dirt off of the wall will make it much lighter and easier to transport.
Depending on the model and your level of confidence, you can sometimes leave the water plates and straps on each buttress – Doing this can make re-assembly much easier.
The drawback to this is that it makes moving the buttresses much more awkward and will take up a lot more space for storage(and delivery)
Ovals can be very tricky to re-install. I strongly recommend that you take measurements of the dimensions of the oval and record them before taking down – Ovals usually aren’t the exact size that they are described.
As an example, a 15×30 oval actual dimensions can be14’8”x 30’ 4” or 15’ 2’ x 29’ 8” and so on. Not knowing the actual dimensions of an oval and trying to install it based on thinking it should be exactly 15×30 can make for a gigantic installation headache.
This is especially true for strapless ovals as you can get them way off.
Wasps, spiders, and frogs like to live within an above-ground pool – Be aware of this
Do not try to save the liner. It will be a waste of your time – Yeah, mic drop on this.
Be careful taking resin parts apart. Some can crack or break easily – Some resin parts are going to crack or break when you take the pool apart. It’s just a fact. Just try not to break the parts so bad that they can’t be reused. In most cases, broken resin parts can be reused which is good.
You can reuse the patio blocks/stones used to level the pool – Most DIYers and almost all professional pool installers will use some type of patio stone or block under each upright for leveling. If you want, you can dig them out and re-use them as well. As long as they are made of a cement product, they will last for years and are definitely re-usable.
If the pool has wall foam or foam coving, each most likely cannot be re-used – Don’t bother trying to keep them.
If the used pool has a dog house for the equipment or a storage container made of wood, it’s not usually worth the effort to take them. So, unless they are in really good shape, leave that stuff there.

Great info the pool i’m taking down has overlapping top rails with a odd 3 sloted top to remove. What kind of pool is this. Thank You John
Sorry. That’s not nearly enough info for me to know what kind it is.
Used our oval 15 x 26 2 summers in MI. HAD IT DISASSEMBLED then delivered to New home-itstill rolled up, set aside with deck n frame. Sat for 6 years. Worth a sale or $ for scrap?
Not a big fan of putting up a used oval, but if it’s in good shape, then maybe try to sell it. Supply chains are still messed up, so the market for used pools is still very good (This is as of November, 2021)