Out of the options that you can get for an above-ground swimming pool, installing a main drain is my favorite and most recommended.
Many people don’t know that they can install a main drain in an above-ground pool. And others who do know will not opt to get one as they are too afraid that they will leak.
Installing a main drain in an above-ground swimming pool is not too difficult. With some basic knowledge of plumbing PVC, one can be successfully installed by a do-it-yourselfer. The biggest concern is making sure all fittings are well glued and the screw holes for the main drain seal cover be completely free of dirt.
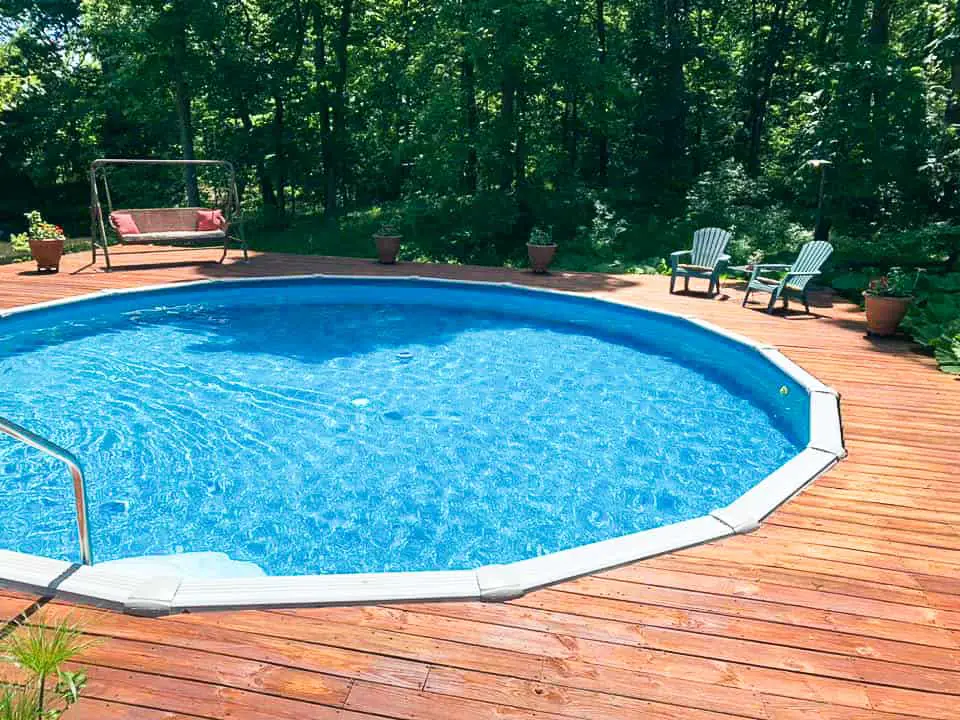
WHY WOULD YOU GET A MAIN DRAIN FOR YOUR ABOVE-GROUND?
I’m a big fan of main drains. There’s a reason why inground pools have them. The biggest is that a main drain gives the pool great overall circulation, which can be lacking with many above grounds.
The other great reason to get a main drain is that it will help keep the pool clean. Learn more about main drains and above ground pools here.
MOST MAIN DRAINS DON’T LEAK. THE ONES THAT DO WILL LEAK FOR THIS REASON
Main drains typically don’t leak, but they will get blamed for leaking almost every time.
All pools will leak at some point. That is a fact. When an above-ground pool has a leak, people will think it is from one thing or another. When the pool has a main drain in it, they will almost always think it’s leaking there.
Main drains for vinyl pools are designed well not to leak. In my 36 years of being in the business, I have very rarely seen a leaking main drain.
The ones that I did see leaking were all leaking for the same reason – Because the screw holes had dirt in them and the seal plate could not be tightened down all the way.
Main drains are installed in the ground. And the ground has dirt and sand. A main drain has eight screw holes in its body. These holes can very easily get dirt in them.
When any of these screw holes get even the smallest amount of dirt in them, then the screws that hold down the top plate (which seals the drain to the liner) will not be able to screw all the way down.
This will prevent a tight seal and the drain will leak.
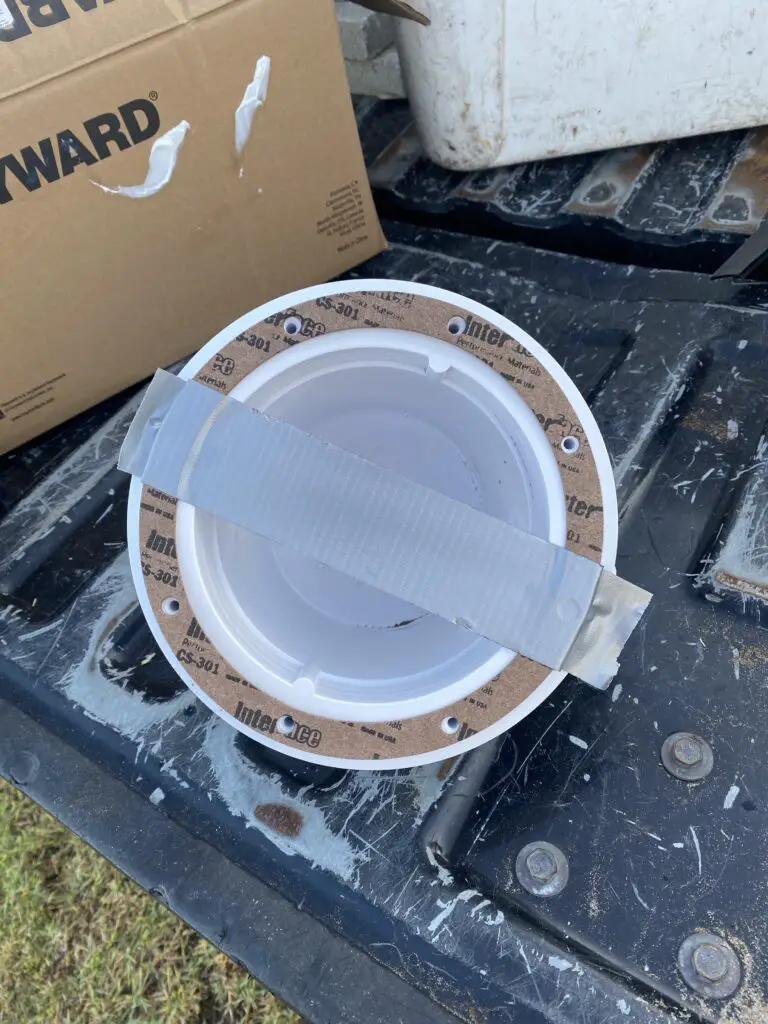
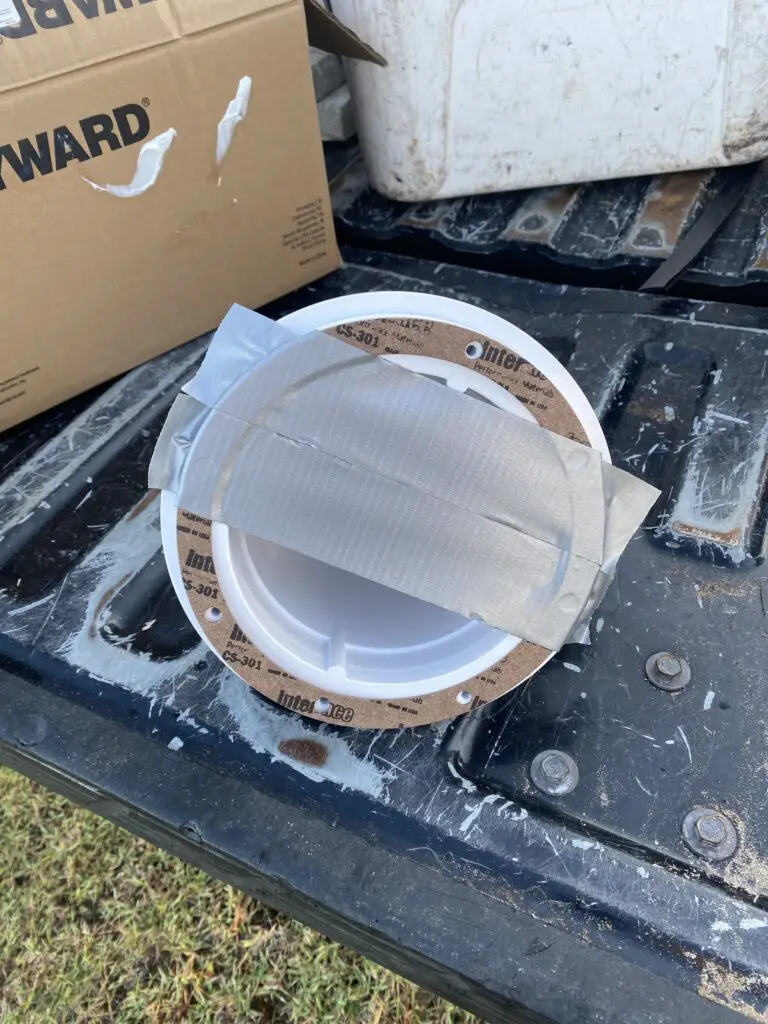
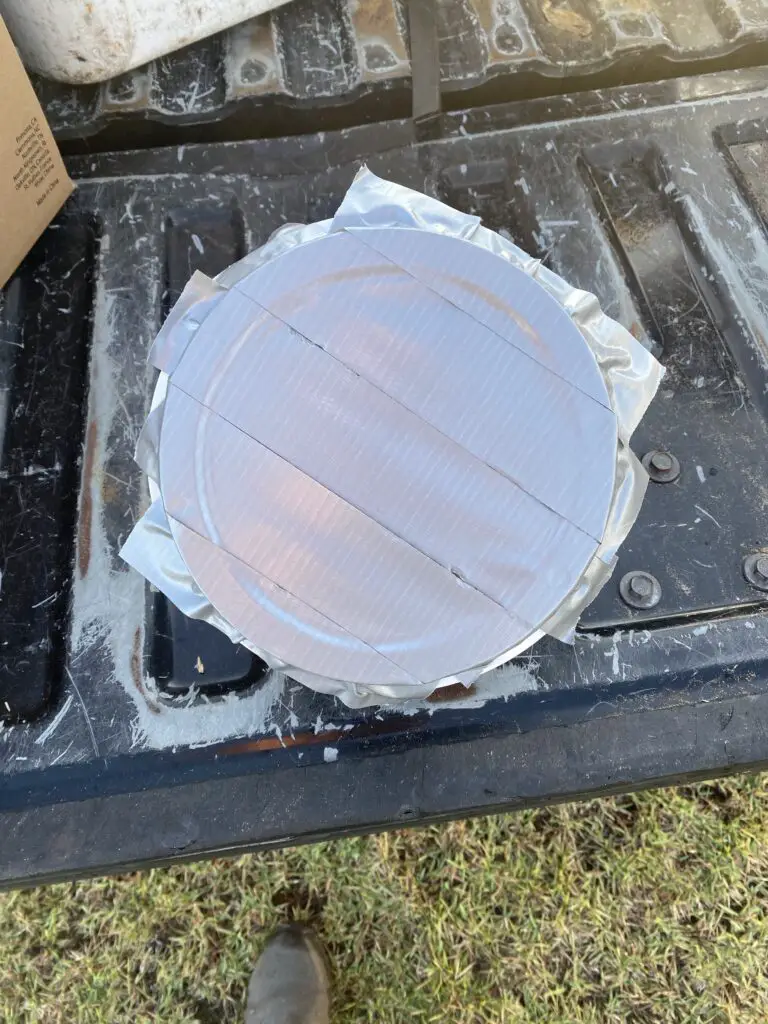
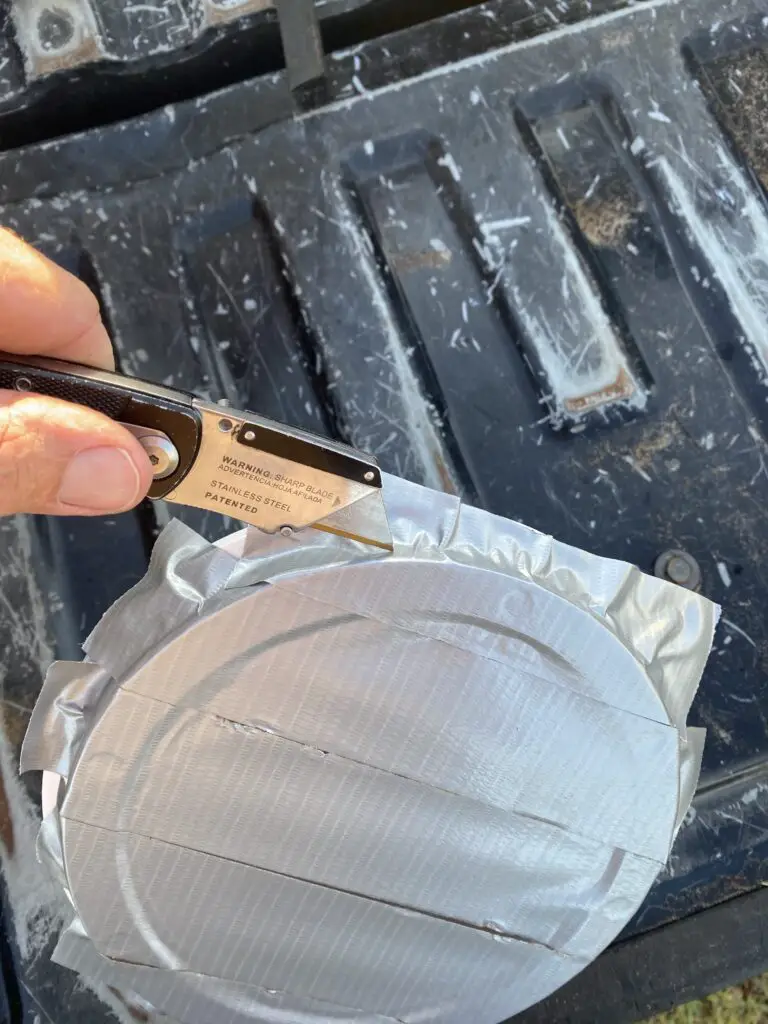
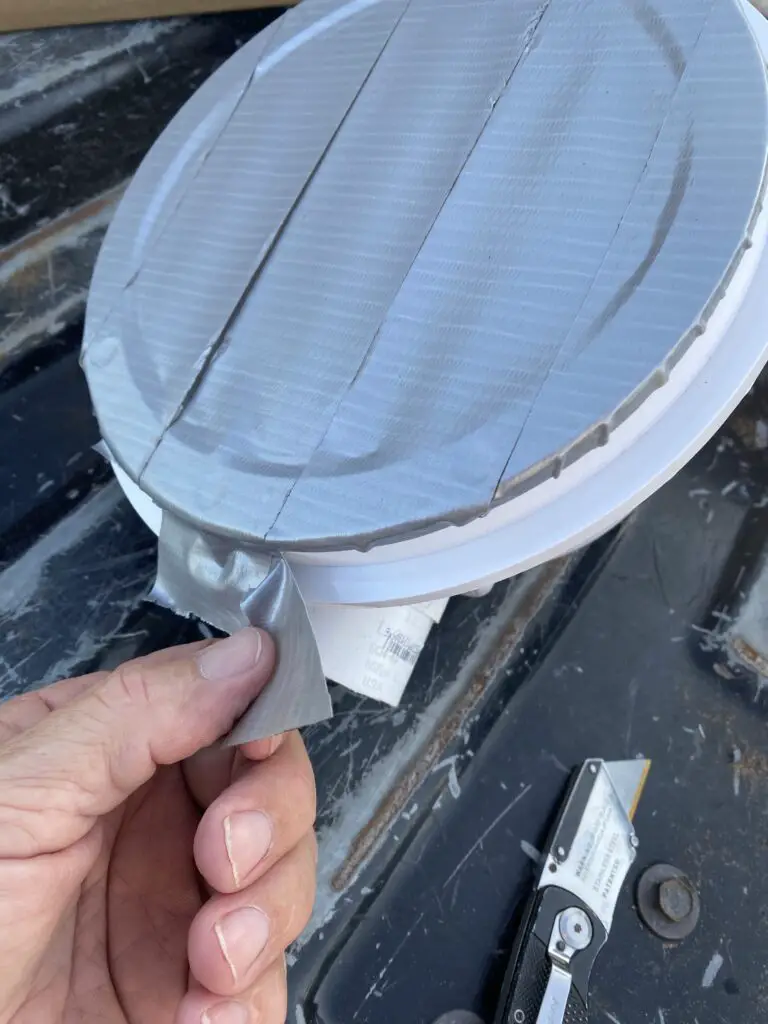
Taping the screw holes prior to installation with duct tape will prevent any dirt from getting in the holes.
How to install a Main Drain in an Above Ground Pool
MATERIALS NEEDED
- Main drain (complete)
- Approx, 20ft Sch40 PVC 1.5” piping
- 1.5” sch40 fittings including several 90°slip to slip, male threaded to slip, couplings, and one 3-way (tee)
- 2 – 1.5” ball valves
- 100% silicone
- PVC glue
- Tape measure
- Torpedo level
- Hacksaw or Sawzall with metal or universal blade
- Adjustable wrench
- #3 Phillips screwdriver
- Utility knife
- Duct tape
- Shovel
- 4”x4” patio stone or something similar
STEPS FOR INSTALLING A MAIN DRAIN
Step #1- Prepare the Main Drain
I’m making this the first step because it is a very important one. The main drain must be tapped up to cover the screw holes.
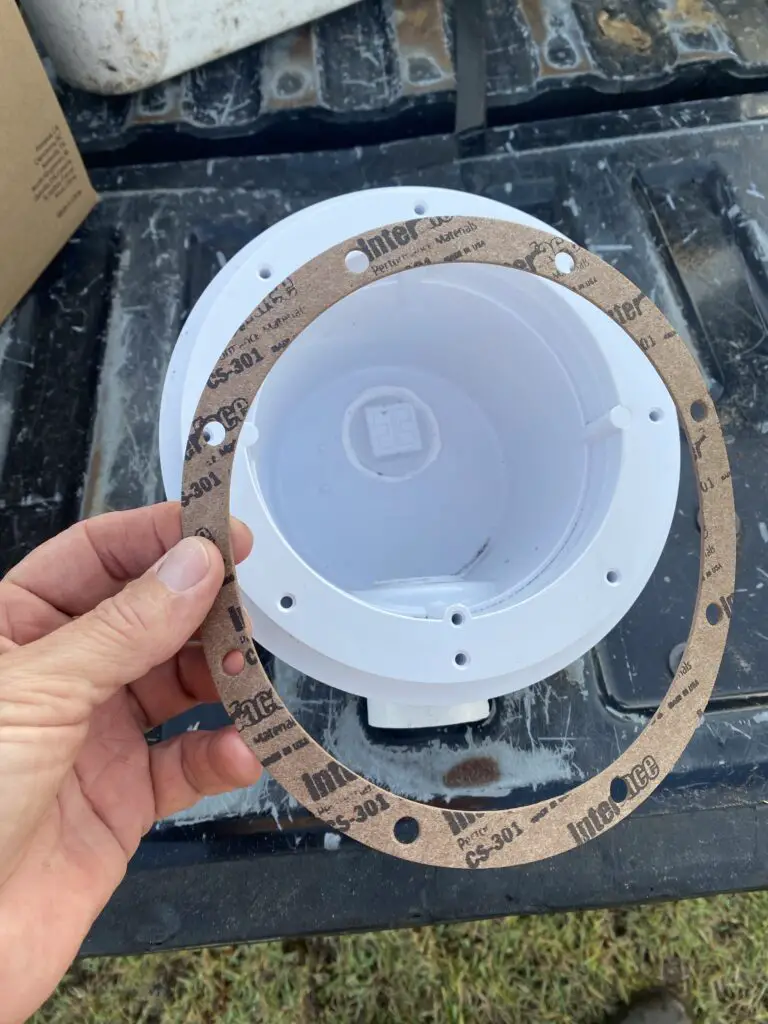
Your main drain will come in a box with the following pieces:
Main drain body
1.5” male threaded plug
Cover ring
Cover
2 ring gaskets
Ring and cover screws
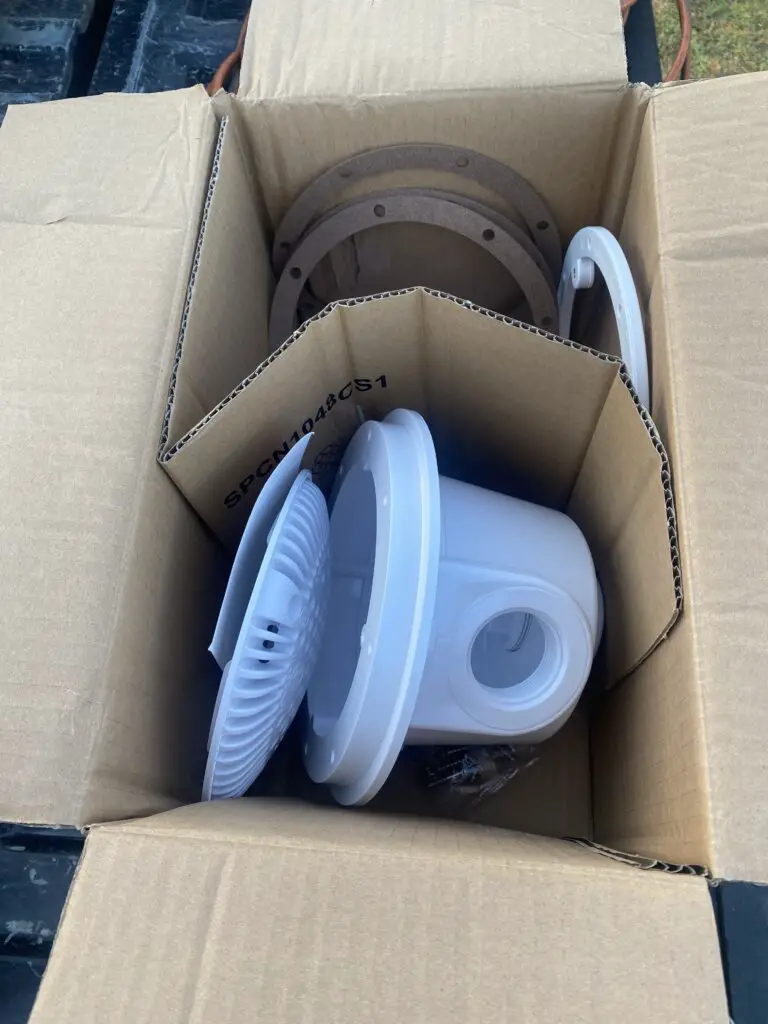
The main drain body will have two openings for PVC piping – one at and side and one at the bottom.
To make the install much easier, use the side opening for your plumbing connection and just plug the bottom opening. Use the 1.5” threaded fitting it comes with to plug the bottom opening.
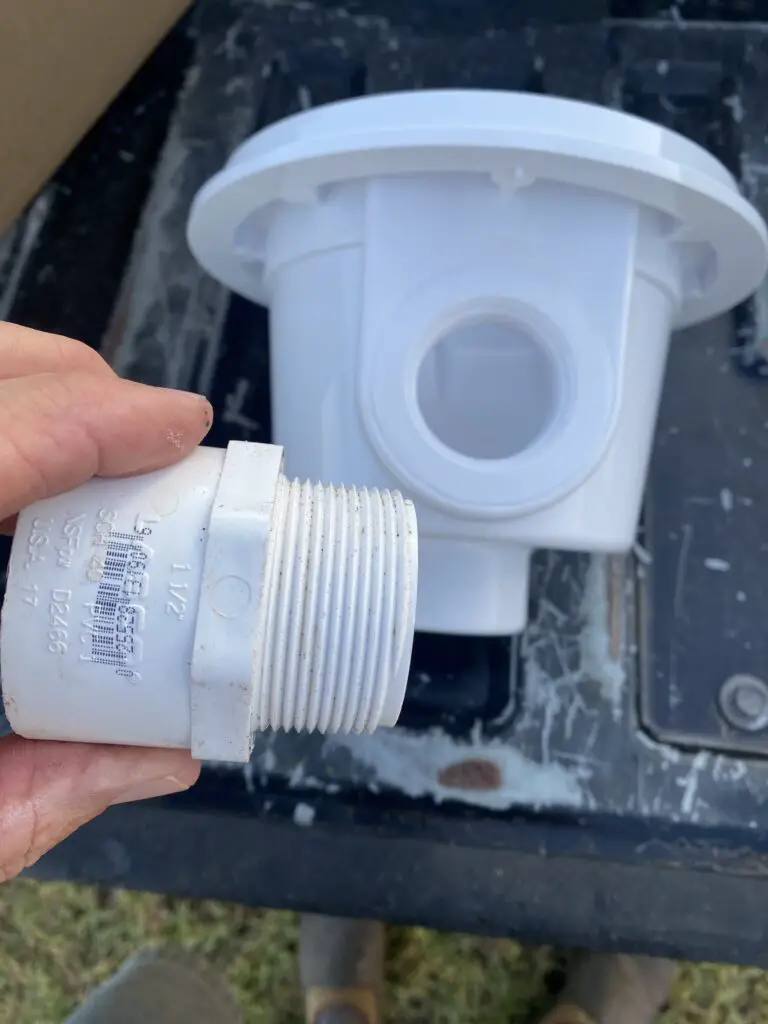
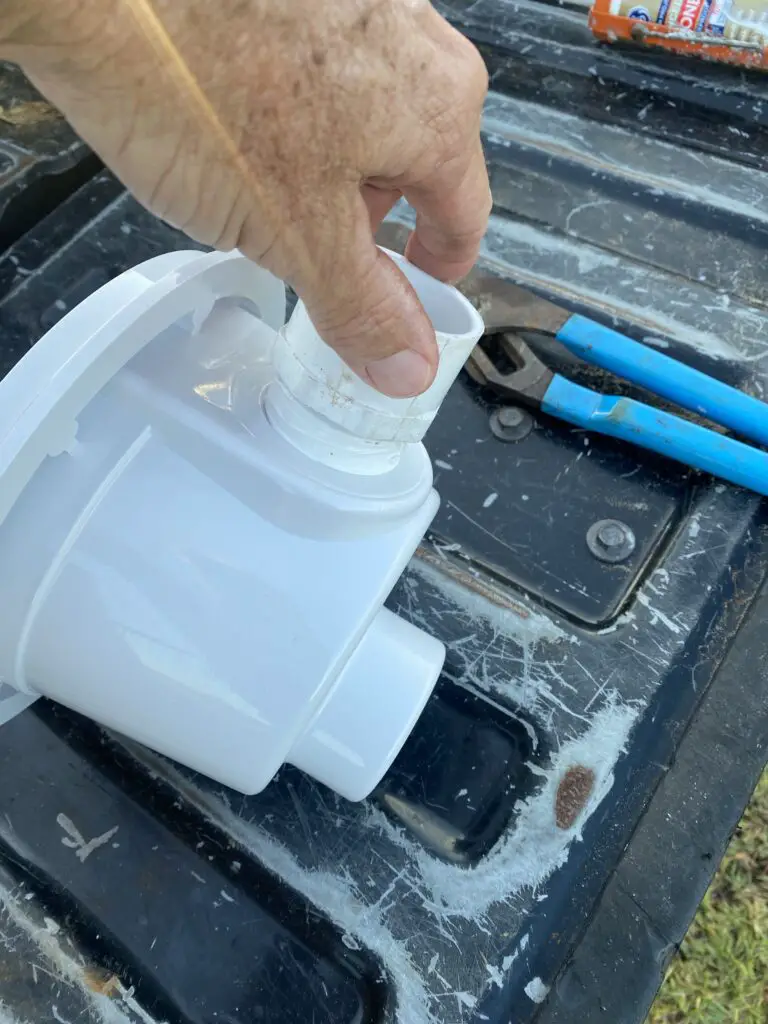
Run a bead of 100% silicone around the threads of the plug, then use your finger to smooth the silicone into the threads (This ensures the silicone will seal the fitting in place).
Screw the plug into the bottom opening. Use the adjustable wrench if you need to. NOTE: Screw the plug in the bottom opening from the inside of the drain body and not from the outside bottom.
Now, apply the silicone in the same way to a 1.5” male threaded to slip the adaptor and screw it into the outside of the drain body at the side opening. Use the wrench to make sure it is screwed far in.
Your main drain tank body is now plumbed with the two fittings and is ready to be taped up.
Take one of the gaskets and line it up with the top of the drain body. Each has 8 screw holes that will line up perfectly. Using strips of duct tape, tape the gasket to the drain body at each screw hole opening. There are eight screw holes, so you will be using 8 pieces of tape. Make sure the duct tape pieces stick to the drain body so the gasket cannot move.
Your drain body is now taped and ready to go.
Step #2 Find the Center of the Pool
In reality, you can install a main drain anywhere at the bottom of the pool, but for best results, you’ll want it in the very center of a round-shaped pool.
NOTE: The bottom track of the pool must already be set and leveled before installing the main drain. Installing the main drain prior to the track being set can result in the drain being off-center and set too high.
In three different places, measure from the bottom track inward half the radius of the pool’s dimension. For example, if you have a 24’ round pool, you will measure 12’ inward from three different spots around the bottom track to find the pool’s center.
NOTE FOR OVAL POOLS: Many oval above-ground pools cannot have a main drain in the dead center due to buttress straps getting in the way. For ovals, I recommend setting the main drain in the center of the radius opposite of where the skimmer opening is placed.
Step #3 Set the Main Drain
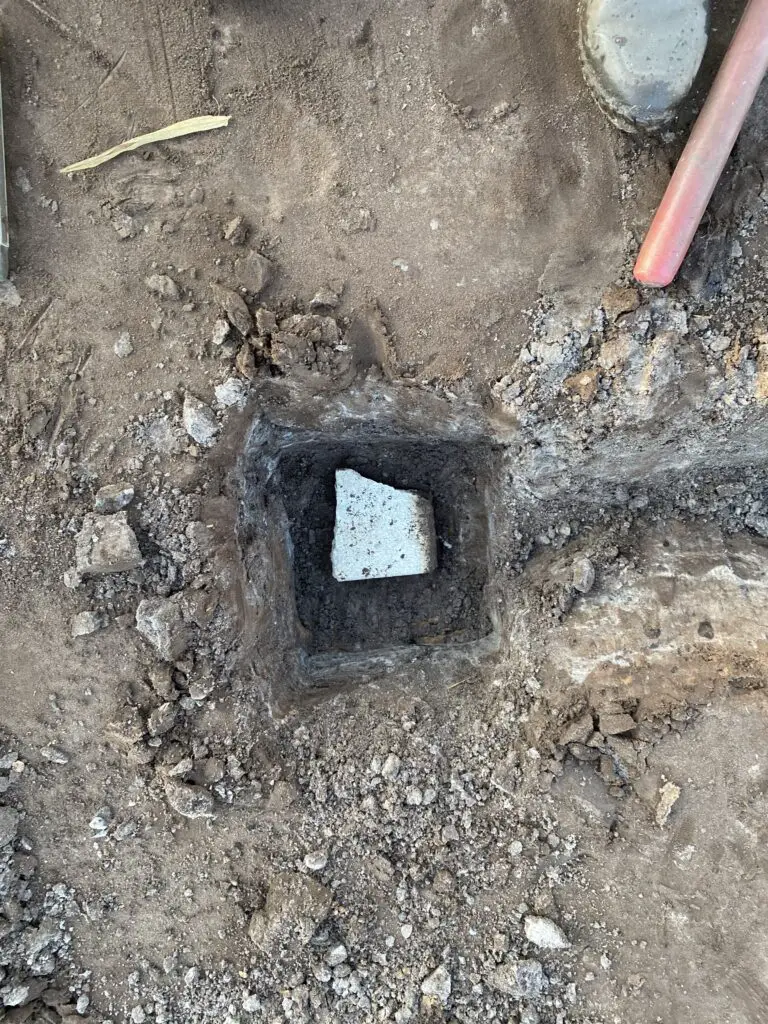
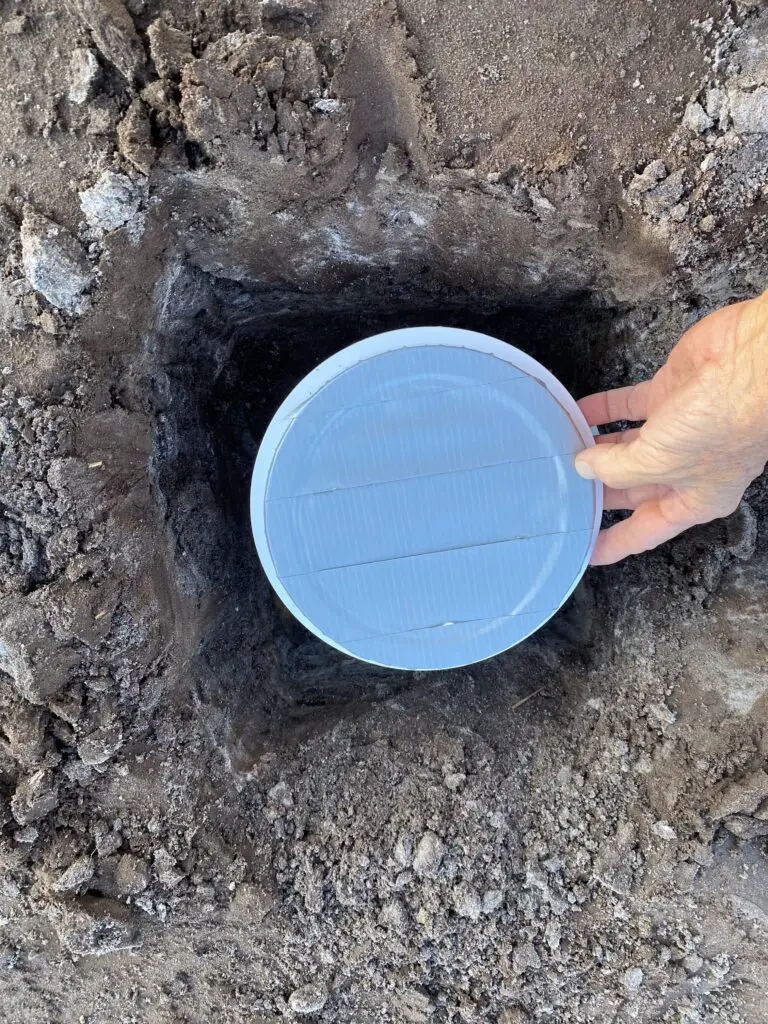
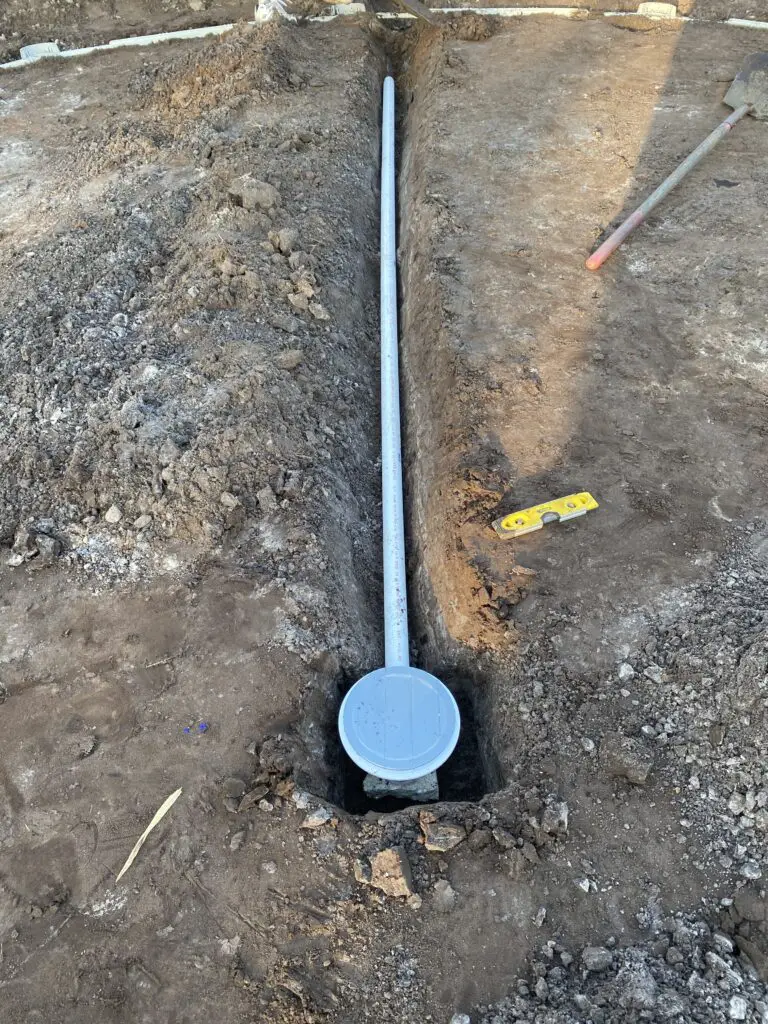
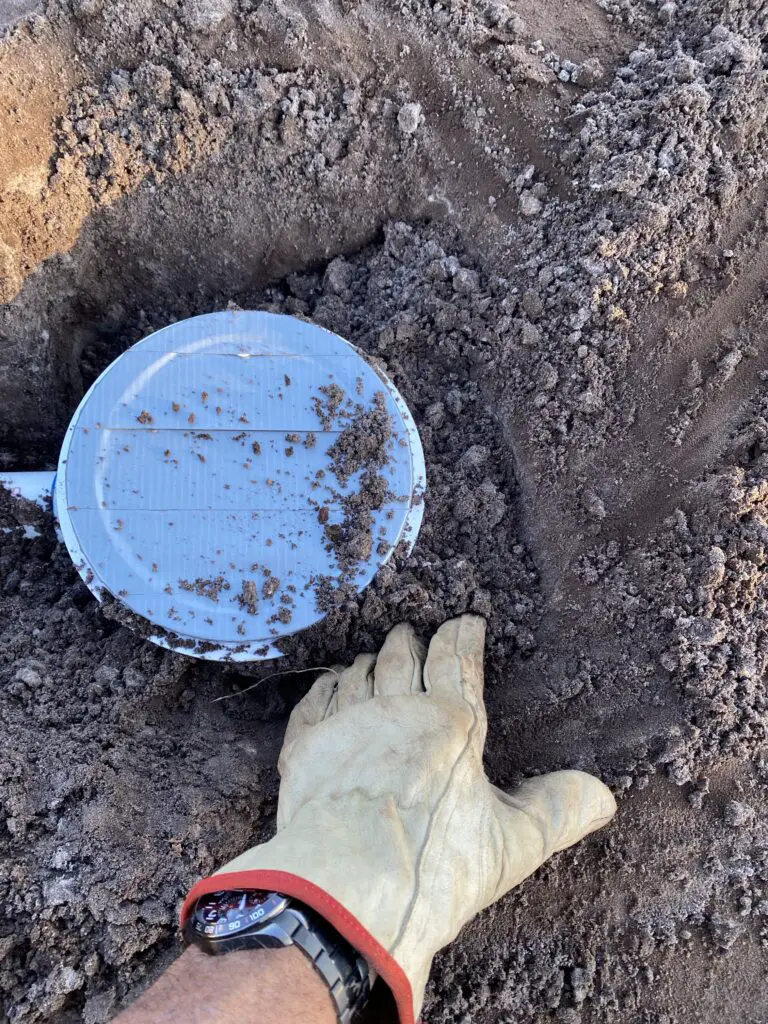
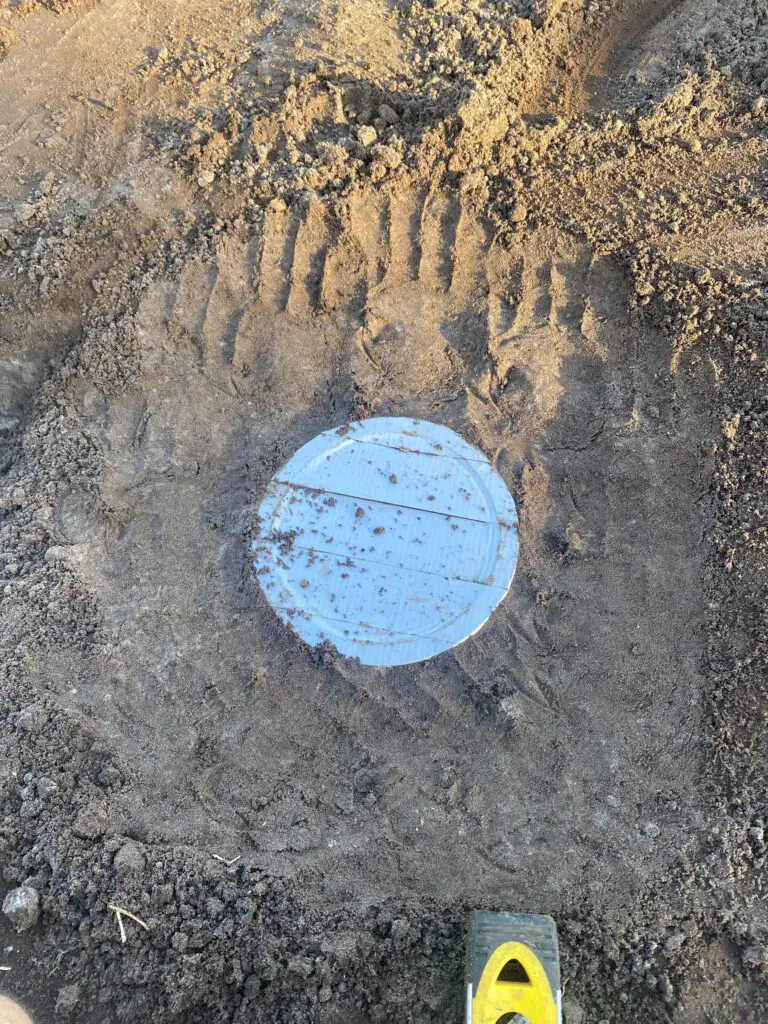
Now that you have found the center of the pool, it’s time to dig a hole to set the main drain body.
Using a shovel, dig about a one-foot wide round hole at your pool’s center mark. This is where your main drain will go. Dig the hole deep enough to get the drain at the level you want.
NOTE: It’s best to have the main drain slightly lower than the level of the pool’s bottom track. This way, the drain will be at the lowest point of the bottom of the pool.
You will want to set the main drain body on a patio stone, so dig the hole deep enough to put the stone down first. Using the torpedo level, level the patio stone both ways.
Now place the main drain body and the patio stone to make sure it’s at the level you want.
Step #4 Dig the Trench for the PVC Piping
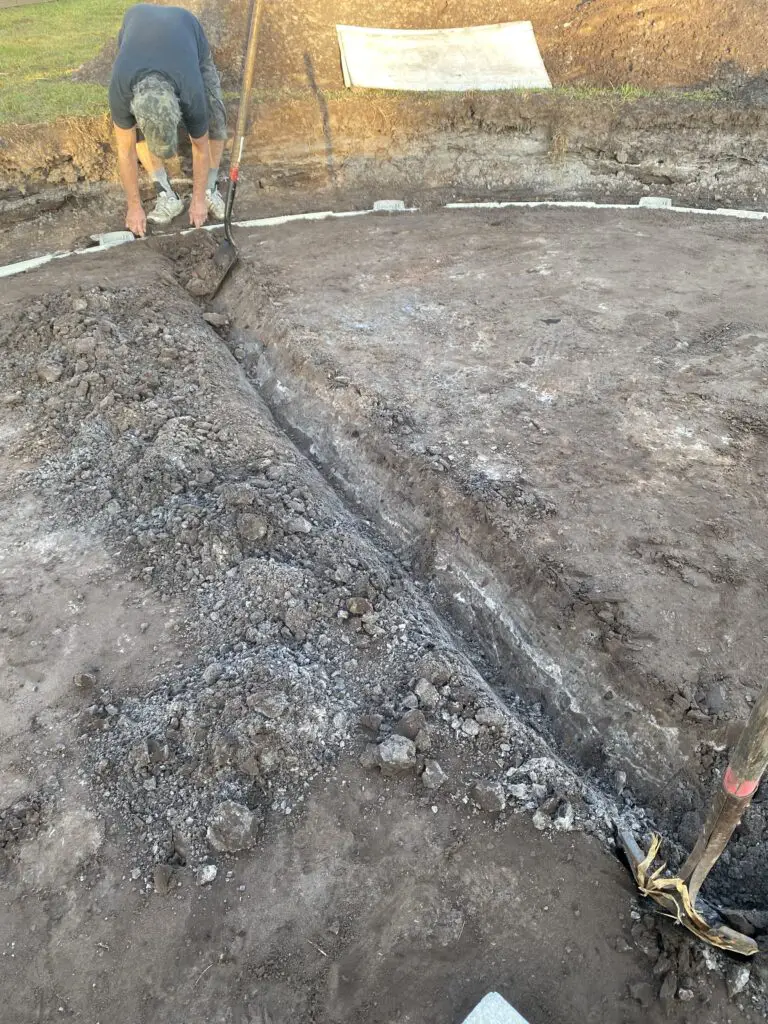
A pipe will have to connect the main drain to the pool’s equipment. And this pipe will run underneath the pool’s liner, so it will have to be buried.
At this point, you’ll have to decide where the pump and filter will be going. You can have them anywhere around the pool that you want.
NOTE: Oval pools can only have the skimmer/return openings at the ends or corners of the pool (not on the straight sides). So, since the pump and filter should be in front of these openings, this means that your oval pool’s equipment should be placed at either end of the pool.
Once you have decided where the pool’s equipment (pump/filter) is going, mark a line from the center hole that you made for the main drain out to where the pump is going to be. This will be where you dig the trench.
Dig the trench about a shovel’s width from the main drain hole to the outside of the pool. I like to dig out about a foot further out than the pool’s bottom track.
Step #5 Glue the PVC Pipe to the Main Drain and Set
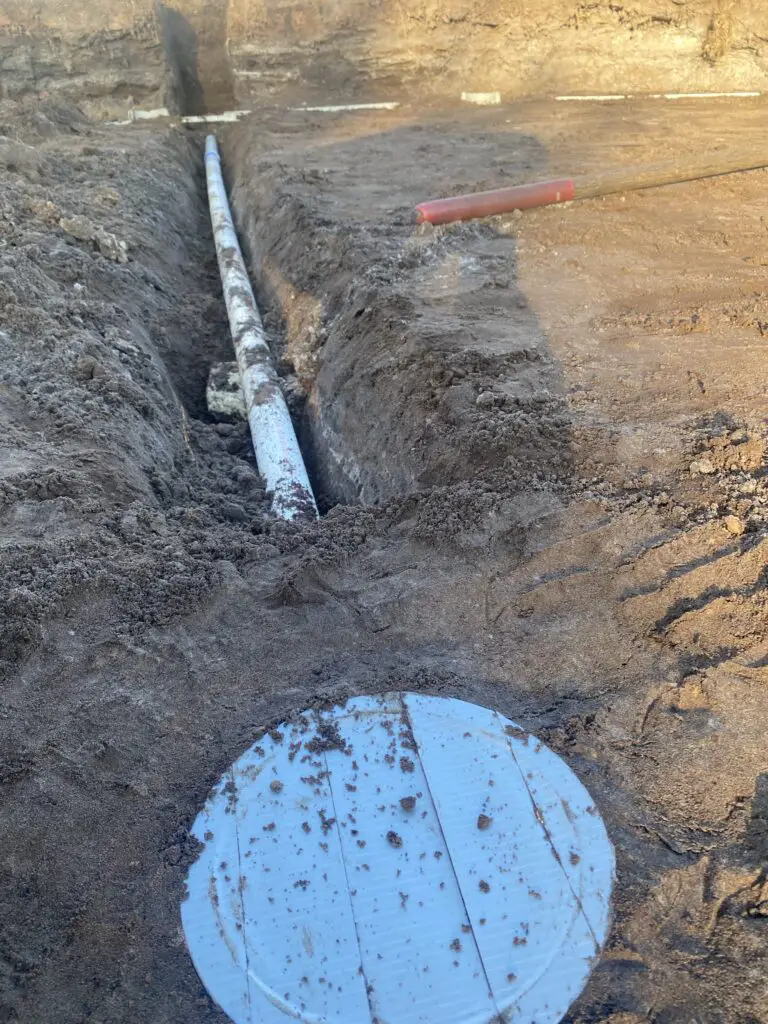
Now that the main drain hole is dug, a patio stone is at the bottom of it and level, and there is a dug trench, you can now set the drain in place.
Glue a long piece of 1.5” PVC pipe to the main drain. This will be where the male adaptor that you screwed in is sticking out. Make sure the glue is somewhat dry and then set the drain and pipe in place.
With the drain in the hole, start packing dirt around it to set it in place. Set the torpedo level on top of the drain and make sure it stays level as you pack dirt around it.
When you have packed dirt well around the drain, it will be firmly in place. It’s time to bury the pipe.
Step #6 Bury the PVC Piping
At this point, you’ll have the main drain set with dirt around it and the attached pipe will still be exposed. If the pipe does not extend under and past the bottom track of the pool, you will need to add a piece of pipe to it.
Measure the length you need to make the pipe extend out past the pool’s bottom track(and ultimately the wall) and cut a piece of pipe to fit.
Use a 1.5” coupling and glue the piece you just cut to the existing piece in the trench. When done, you should have PVC piping in the trench and extending at least 10 inches past the bottom track of the pool.
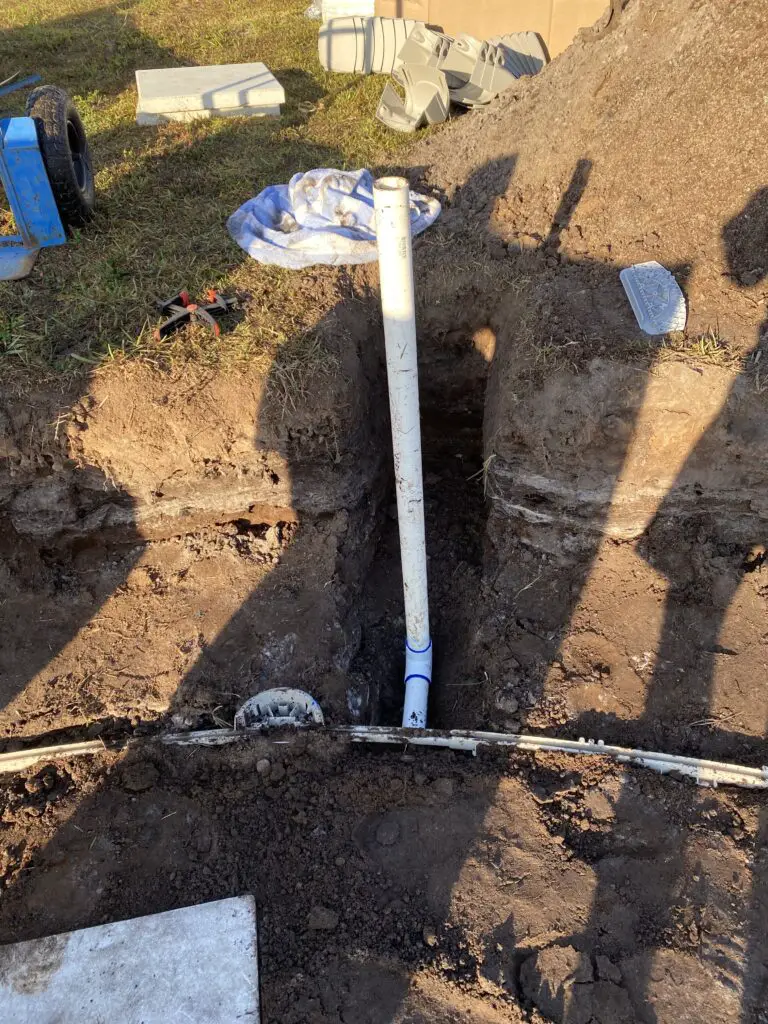
Before burying the pipe, glue a 90° elbow to the end of the pipe and then add at least a two-foot piece of pipe to the elbow. This will leave a pipe sticking up and out of the ground which will be attached to the main drain (and the pool’s equipment in the future).
Once the “stubbed-up” pipe is glued, you can now bury the pipe that is in the ground. Continue to use the torpedo level on top of the main drain to make sure it stays level while burying the pipe.
When burying the pipe, make sure to pack dirt firmly under and around it. And while filling the trench, step on the earth and pack it down as good as you can.
When the trench is filled in, water everything down so it removes air and packs even better.
Your main drain is now in place with PVC piping attached and buried and sticking upward. You can now roll out the wall and finish the pool installation.
NOTE: If you’ve installed a liner guard under the liner, cut a big opening in it for the main drain. You don’t want the liner guard in the way when screwing down the seal plate (on top of the set in place liner).
Step #7 Install the Skimmer and Set the Pump and Filter
The main drain line will have to be attached to the suction side of the equipment. This means it will be attached to the skimmer line that goes into the front of the pool’s pump.
Having a main drain in your above-ground pool means that the pump will have two ways to get unfiltered water from the pool – the skimmer and the main drain.
This means that the two lines (skimmer and main drain) will have to converge into one. This is accomplished by using a “tee” fitting.
Before being able to attach the main drain line, the skimmer has to be installed to the pool’s wall. This is so you can plumb it to the pump.
The pool’s pump also has to be set in place. This is so you will know where the destination is for the piping.
Step #8 Plumb in the “Tee” Fitting
Now that you have the pump set in place, you can plumb in the 1.5” Tee fitting.
Using 100% silicone, screw in a 1.5” male adaptor to the front of the pump (This is the opening in front of the pump basket). This will leave a 1.5” slip fitting.
Glue in at least a five-inch long piece of 1.5” PVC pipe into the front of the pump. Now glue the “Tee” fitting to that pipe. It’s best to glue the middle opening of the tee fitting to this pipe.
Note: Make sure the “Tee” fitting is level by temporarily sticking a piece of pipe into one of the other ends of the tee. (do not glue it). Place the torpedo level on the top of this piece while gluing the tee to the pipe connected to the pump. Make sure it is level as the glue dries.
Step #9 Add Two Valves
If you have done this right, there will be a tee fitting glued to a five-inch piece of PVC pipe sticking out of the front of the pump.
Cut 2 five-inch pieces of PVC and glue them to the remaining “Tee” openings. Now glue a 1.5” slip to slip ball valve to each pipe.
You now have two valves connected to a tee, which is connected to the pump. It’s time to connect these valves to the skimmer and main drain lines.
Step #10 Plumb the Skimmer to a Valve
This stage of plumbing requires some forethought. You’ll want to think first about how to get PVC pipe from the skimmer opening to one of the valves that you just glued in. Take your time with this.
Start by screwing in a 1.5” adaptor fitting to the bottom of the skimmer. What I do now is temporarily stick a piece of pipe into that fitting (the one under the skimmer) to help me gauge the path to the valve.
Use 1.5” elbows (90° fitting) and PVC pieces cut to length and connect the bottom of the skimmer to one of the valves. Try to make it look nice by keeping everything level by using the torpedo level as you glue.
Step #11 Plumb the Main Drain to a Valve
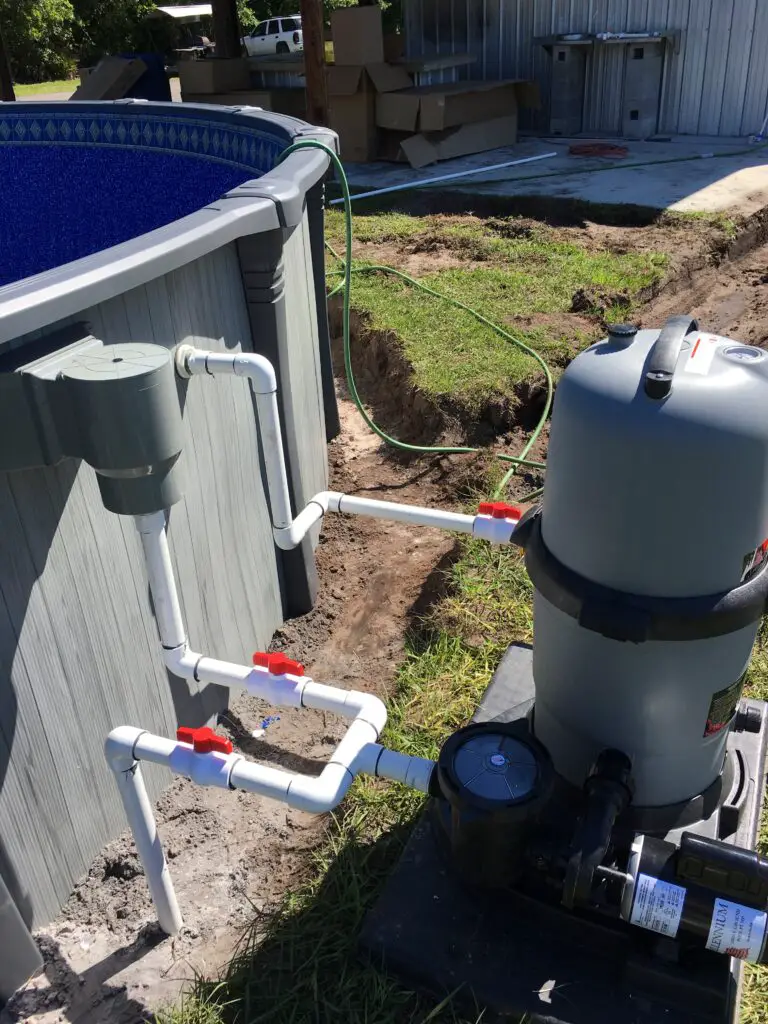
After completing step 10, there will be one valve left open. This is where you will connect the main drain line.
So do the same thing that you did to connect the skimmer. Take your time and think about the path you are going to take from the pipe sticking out of the ground(from the main drain) to the open ended valve.
Use 1.5” elbows and PVC pieces cut to length and connect the main drain line to the other valve.
Once you have connected the main drain pipe to the open valve, your main drain install is complete. There is now just one more thing to do.
Step #12 Install the Seal Ring and Cut the Liner
For most doing it for the first time, this will be scary. Don’t let it be.
NOTE: The main drain seal ring should only be installed AFTER the liner is in place. Make sure the pool has at least a few inches of water in it before starting this step
Get in the pool with the main drain seal plate, gasket, plate screws, cover, a #3 Phillips screwdriver, and a utility knife.
Locate the main drain. With some water in the pool, you may see it outlined under the liner (from the weight of the water).
Feel for the eight screw holes along the perimeter of the top of the main drain. This may be tricky as they are under the liner.
Run one of the stainless screws through one of the holes of the seal plate AND one of the holes in the gasket.
Locate one of the screw holes in the main drain and partially screw in the plate with the gasket. You will now have the plate loosely connected to the top of the main drain with one screw.
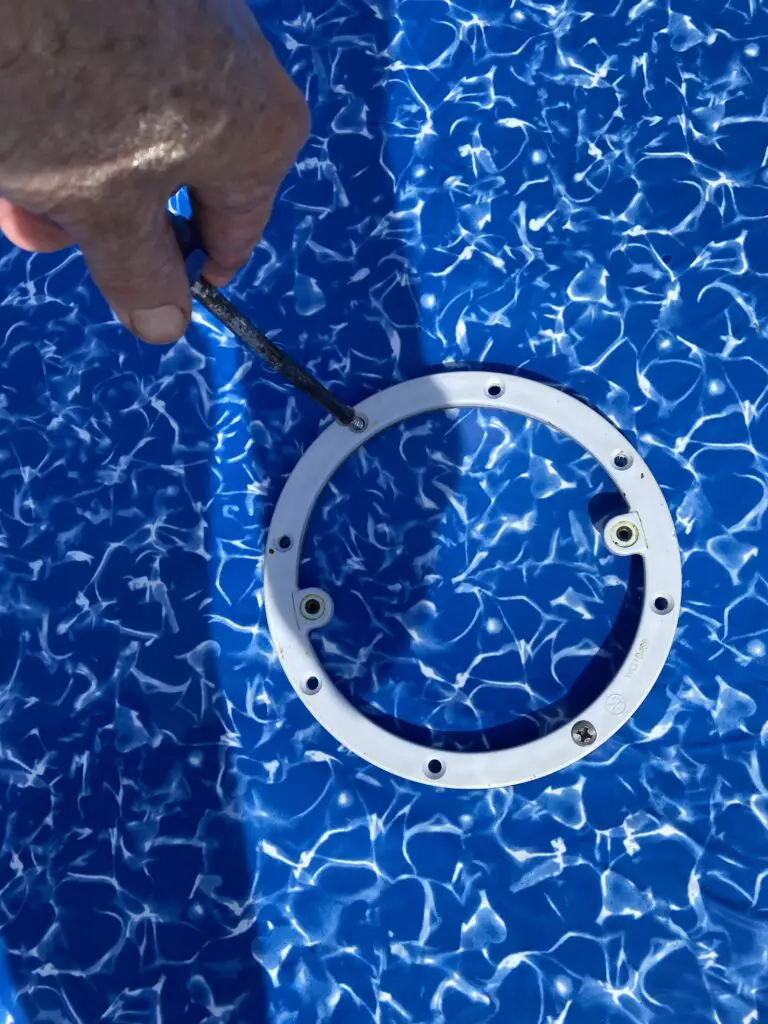
Now, find another one of the eight screw holes and partially screw in another one through the correct hole in the plate. You will now have two screws loosely connecting the plate (and gasket) to the top of the main drain.
NOTE: The first two screws are crucial to making sure you have the pattern of the seal plate lined up with the eight screw pattern of the main drain.
Repeat this step another six times. You will then have all of the screws in place.
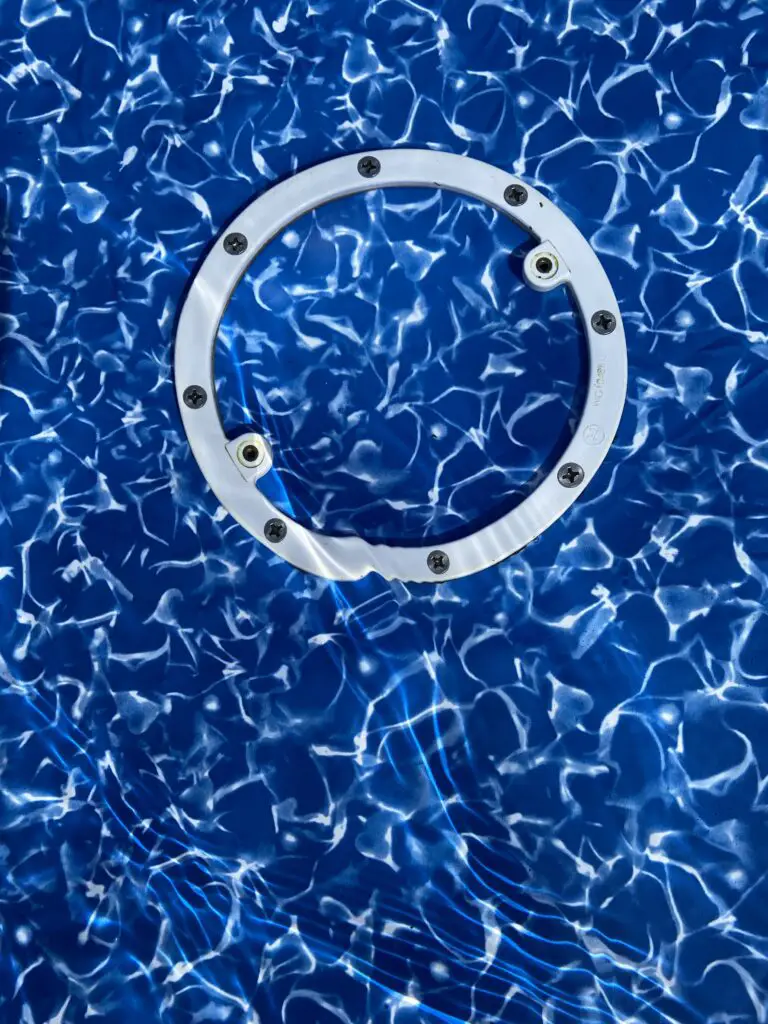
With all eight screws in their respective holes, you can now tighten down the seal plate (and gasket) to the top of the main drain. Tighten the screws very firmly.
At this point, you will look down and only see the seal plate connected to the liner. It will look funny.
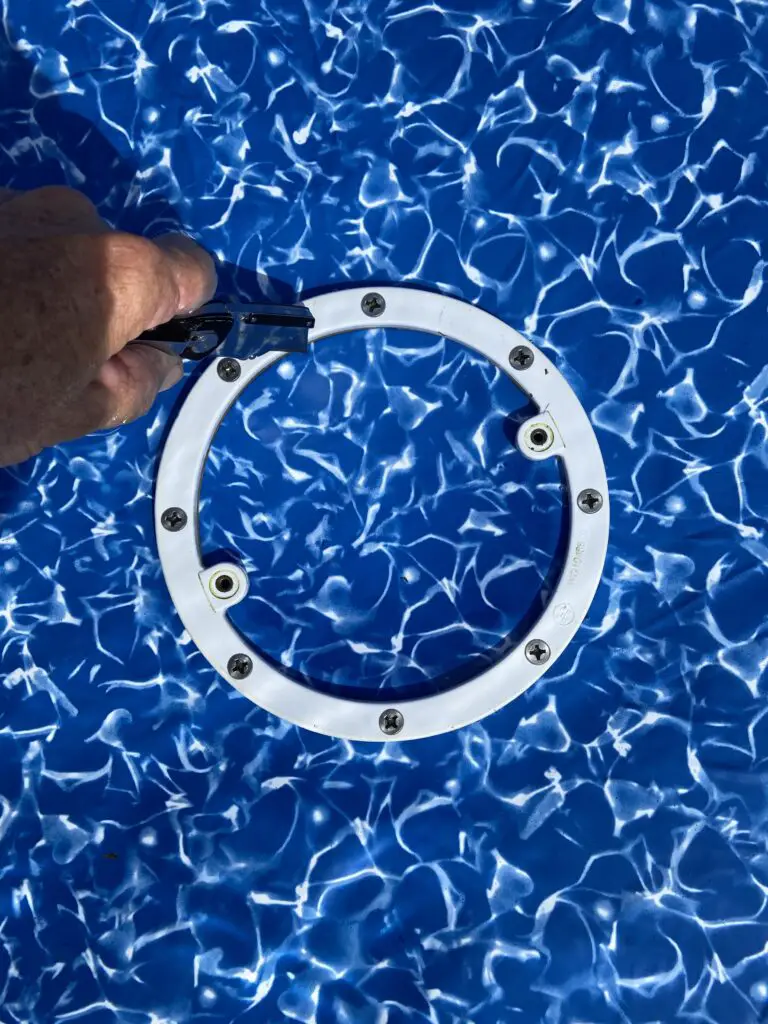
Now that the seal plate is firmly in place, you can cut the liner. Take a utility knife and cut the portion of the liner out that is inside the ring. This is the top of your main drain. Be careful not to let the knife slip when cutting. You don’t want to accidentally slash the liner on the outside of the main drain.
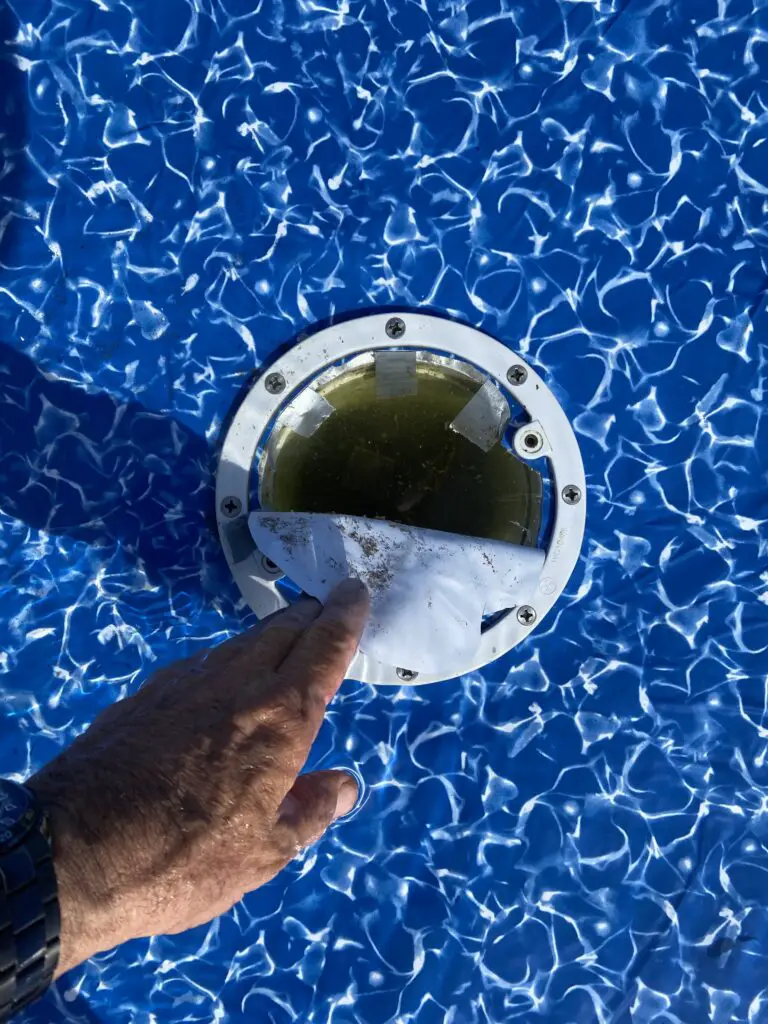
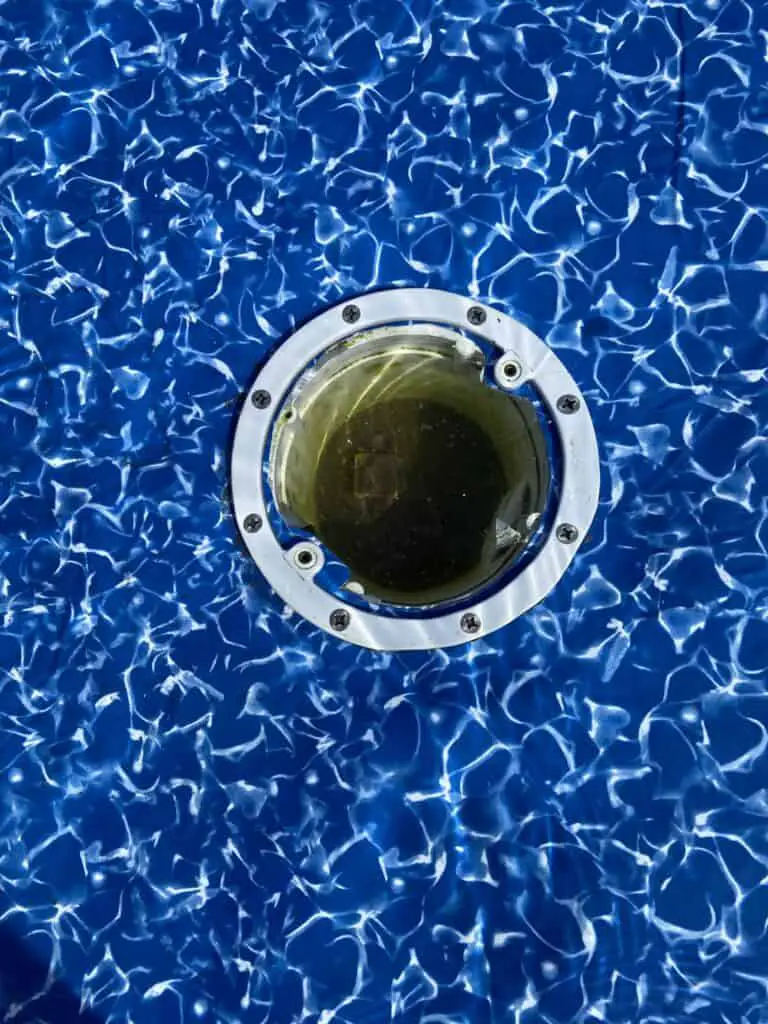
Once the liner at the inside of the ring is cut out, screw down the main drain cover using the two supplied screws. They will be smaller than the eight-ring screws, so you won’t use the wrong ones.
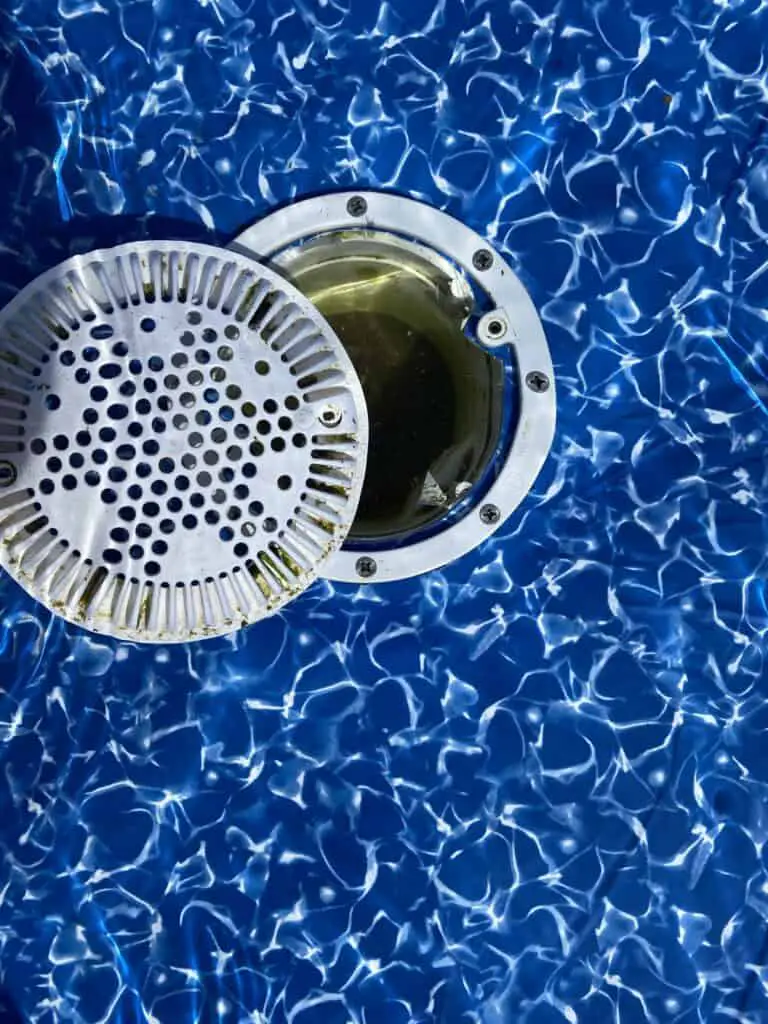
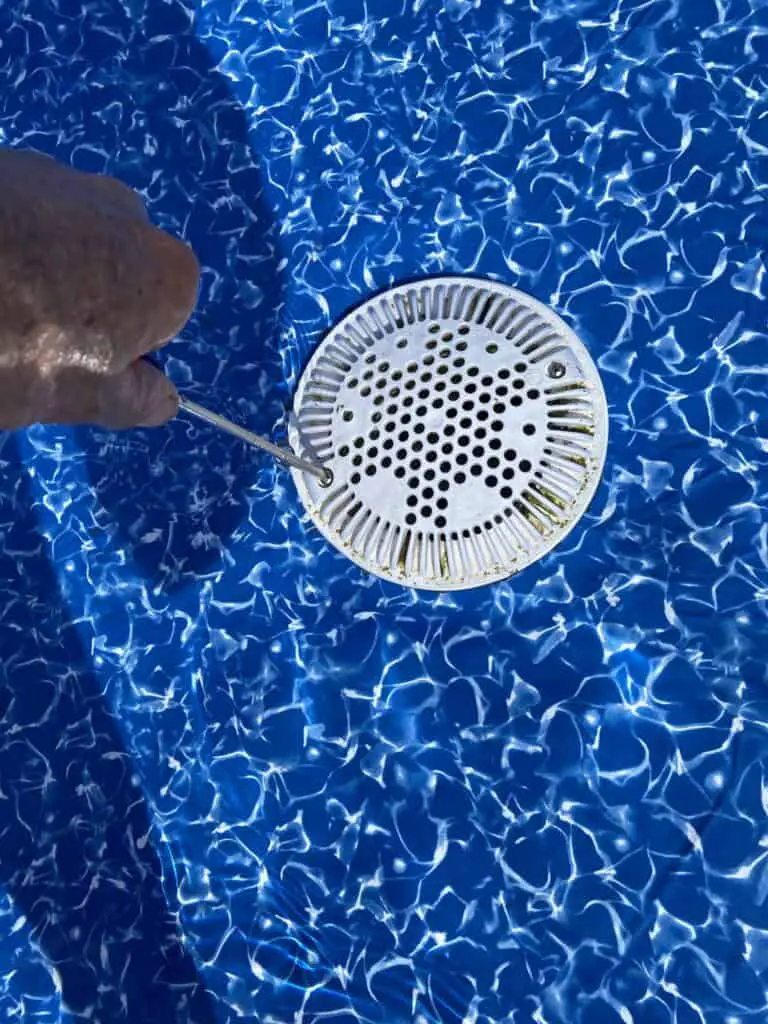
The main drain install is now complete.
ONE MAIN DRAIN OR TWO? THAT IS THE QUESTION
I’ve been in the pool business for a long, long time. Many years ago (sometime right after we invented fire), inground swimming pools had only one main drain. Then some kid drowned in a commercial pool by getting stuck to the suction of the drain with a broken cover. Very sad.
After that, the new code for inground pools was to install not one main drain, but two. This was to solve the problem of there being a danger of too much suction at the bottom of the pool (if it had a broken grate/cover).
With having two main drains, no one could get stuck on one drain as the other one would level out the amount of suction coming from it. In reality, this would work well in most commercial pool applications as they have much bigger pumps and much greater suction.
The new code applied to residential pools too along with one or two other safety components. In residential pools, this wasn’t even close to as much of a safety concern, but you know how US safety goes.
There has never been any national code for main drains in above-ground pools, but many in the business of permits and safety strongly recommended two main drains in above grounds. This danger is nearly non-existent with above-ground pools, but stats never stop those putting safety in front of all things.
Today’s main drains for ingrounds are huge and super complex. With these new drains, there is no longer any need to have two of them.
For above-ground pools, the danger of someone getting trapped from main drain suction doesn’t really exist. This is because above-ground pumps don’t produce enough suction to trap a person.
In all my years of being in the pool business, I have never heard of anyone getting trapped underwater by the suction of a main drain in an above-ground pool. In this world of chaos, I’m sure though that someone has been trapped by one somewhere at some time. And I’m sure the situation was a perfect storm of a broken drain cover along with someone using a commercial pump with their above ground. That is probably the only way it could happen.
With me not being a fear-monger, I don’t recommend installing two main drains. The decision is yours though. It’s human nature that people can be much easier convinced that something is dangerous than being convinced that something is safe.

Do you have any manufacturer/model recommendation for a main drain for my 24′ above ground pool?
Hi. I recommend a Hayward main drain.
I’m loving the treasure trove of information on your site.
Would you recommend a single or double main drain on a 16′ pool? How does installing a pool floor liner affect the instillation?
I recommend a single drain for all above grounds. Some will tell you to get a double though for safety reasons.
Where would you recommend putting the main drain on a 32x16x48 rectangle pool?
Yes. That’s a big enough pool to need more circulation
If the main drain is at level or below level of the soil, how do you then put the 3″ base layer of sand in before the liner? Wouldn’t the sand cover the drain or does it have to be tapered down perfectly to not do so? Or is the drain buried into the sand?
The drain top should be flush with the bottom of the pool. I do recommend the drain be the lowest point of the bottom, so in your case, you can tapper the sand to the main drain opening.
I have a dilemma and I’m hoping you have recommendations for me. I just had an above ground pool professionally installed, with a main drain. The pool is now filling, and we have a large leak, and of course I suspect it’s coming from the main drain. I would like to stop filling, drain, and search for the leak, but the problem is I live in a very windy area, and almost everyday we get large gusts of wind that jeopardize the pool structure. Do you have any ideas on what I can do to see if the leak is from the main drain, and if it is, make sure the main drain plate is on properly so it’s not leaking anymore?
I would go down under the water and use dye to try to see if the drain is leaking. Take the cover off, which will expose the 8 screws and the inside of the seal plate that they are holding down. The method for this is found here:
https://abovegroundpoolsknowitall.com/finding-and-repairing-an-above-ground-pool-leak/
To make sure that the leak isn’t in the piping from the drain to the valve at the pump, you can get a rubber plug and fit it inside the drain at that opening. This will plug the line going away from the drain. Not easy but if you are not sure, then it’s what I would do.
More than likely, the leak is not in the line. But all that it takes is someone forgetting to glue a fitting and then burying it. It can happen , but is very rare.
If you do discover a leak at the seal ring of the drain, then you will want to first try to tighten the screws. If loose, it may stop. If not, then dirt got in the holes during the install. Try then to find (STAINLESS STEEl ONLY) screws exactly like the ones holding down the plate except shorter. REmove and replace one at a time. This may allow the plate to tighten to the drain body better as there may be no dirt getting in the way of the screw going all the way down.
Great article as is. Pictures would really take it up a level.
How do you winterize the pool w/ a center drain for the winter months. Live in Minnesota and have below freezing and sometimes below 0 degree F temps throughout the winter? Can you leave it partially filled or does it need to be completely drained?
I don’t have any personal experience with this as I am in Central Florida. Most completely drain the line and I’ve heard some use an antifreeze. Not sure what is best for you.
In these instructions they do not address what to do with the duct tape that is holding the gasket and covering the screw holes to keep the dirt out. Please be explicit
Leave the layer of duct on when screwing on the drain’s faceplate (8 screws) and top gasket. The layer of tape will act as a gasket. When plate is screwed on, cut liner AND excess duct tape to make the opening for the main drain. Finish by installing the cover (2 smaller screws)
This was of the most informative sites I’ve stumbled across. Answers more questions than the other 20 other sites I’ve read. Thank you for your forthrightness, experience, common sense (ill named these days, as it’s not common) and willingness to help souls as myself from making common mistakes.
Thank you!
i’m installing a new above ground pool and I’m planning on using a single bottom drain. Because I had bought a new pump for my old pool. I was thinking of running the bottom drain to a separate pump and filter (from my old pool) then running my skimmer to my new pump. That way when using the bottom drain i’m taking away suction from my skimmer. Do you think this would be an advantage or not?
Most likely no. Unless you have two very small pumps with very low GPM (gallons per minute) ratings. One decent pump should be all you need for both.